Howdy!
For the last several years, I've been tonguing the idea of making my own kreisels. Local plastic fabricators are hesitant to make radiused bends, expensive, and looking to deal in extremely high volumes. It's somewhat of an ambitious pursuit, admittedly, and doubly so with my limited experience gluing acrylic lack of professional equipment. I'm looking to make these 15 gallon kreisels out of 1/2" thick acrylic - a bit overkill, sure, but I would like them to be robust, reliable, and preferably outlive me.
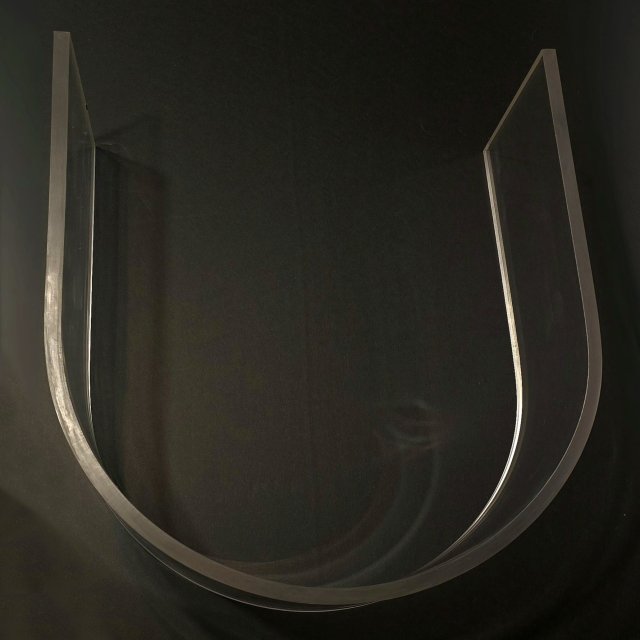
In summary, I have been (fairly) successful in heat bending the acrylic to a form I have made, as shown above. This was, likely, the most difficult part. However, in bending the acrylic, there is some minor distortion. This is to be expected merely by the shape, as a consequence of the bend, the outer edge and inner are displaced to the tune of a few tenths of a millimeter. Not much, but significant enough to cause issues with solvent welding. I have attempted to sand the edges flush, but I can't seem to get them perfect - at least, not to the degree of precision needed for the capillary response to carry a solvent.

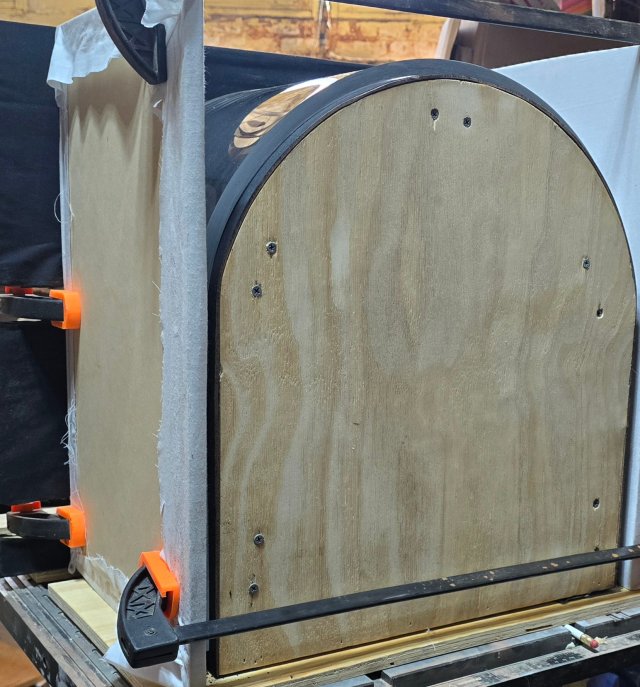
The intention is to sandwich the bent acrylic between two sheets, where it will be suspended, like shown here. Bracing will be added later for additional support. I understand that this is an extremely unusual way to bond acrylic - the best analogy I can think of would be bonding acrylic baffles in a sump.
However, when I attempt the typical "pin" method with Weldon 4 solvent, the aforementioned distortion allows for bubbles to form around the perimeter of the bend - a massive amount, at that. Beyond this, pulling the pins out causes the bent acrylic to glide around on the surface. Yuck.
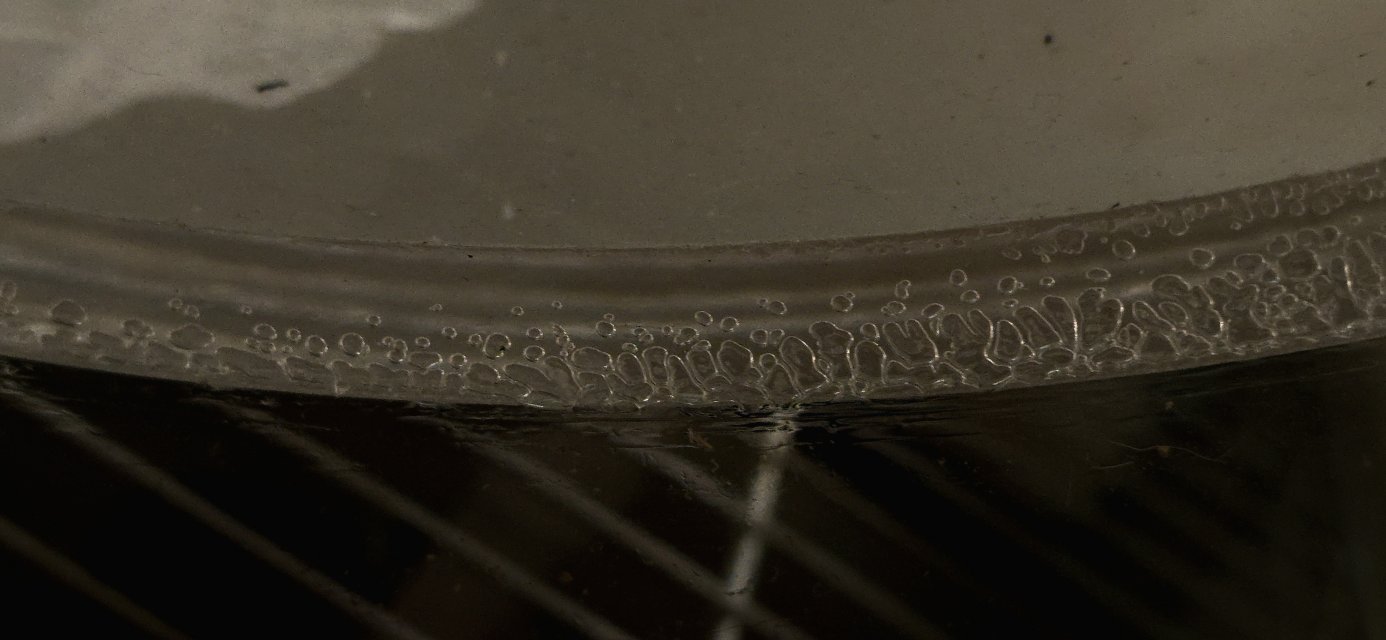
^ I don't quite trust this with even the small volume of 15 gallons of water it holds.
On the other hand, I can get fairly nice seams using Weldon 40. Now, I'm extremely messy with it. Don't judge too harshly, I'm not looking to make a profession out of this.
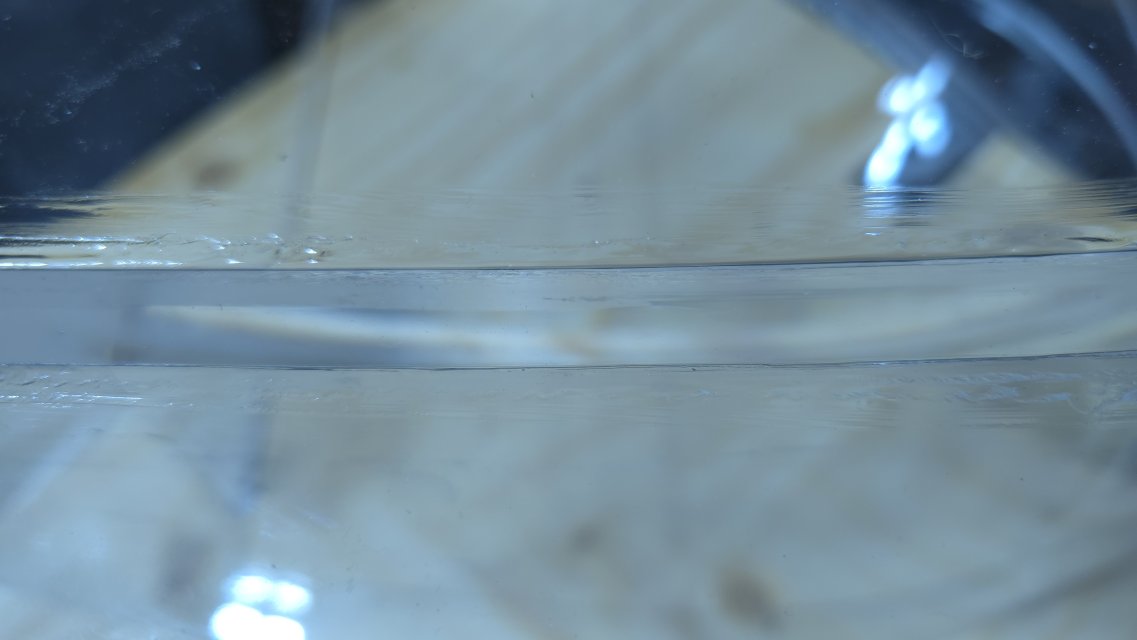
I accomplish this by sanding the edge of the bent acrylic with 400 grit sandpaper (per the manufacturer's instructions) and applying a bead of Weldon 40 around the length of the acrylic, then flipping it over and setting it on top of the acrylic sheet, like shown below. Unfortunately, it isn't quite feasible to sand the sheet of acrylic.
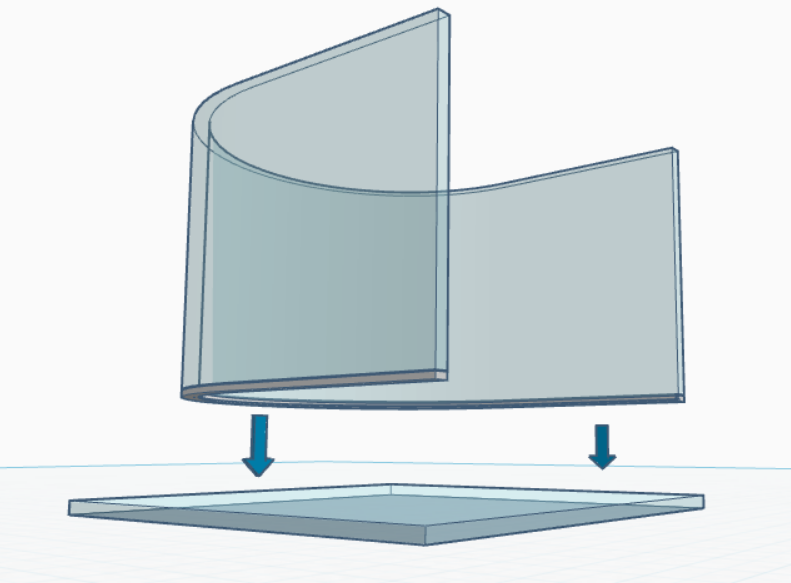
I'm no artist, so hopefully these illustrations are adequate. This is, essentially, what the Weldon representative I spoke with informed me to do. However, I'm not certain they had much of any experience assembling aquariums.
The result is a fair seam, with no bubbles. However, I'm slightly worried about whether or not this is an appropriate use of this product. More specifically, I've seen earlier mentions of the Weldon 40 not being able to "bite" into the acrylic. The result is a seam that "looks good" but might be lacking structural integrity. For what it's worth, I tried my hardest to pull the sheets apart to no avail. However, I would love for someone who's more familiar with Weldon 40 to double-check my work and let me know their thoughts.
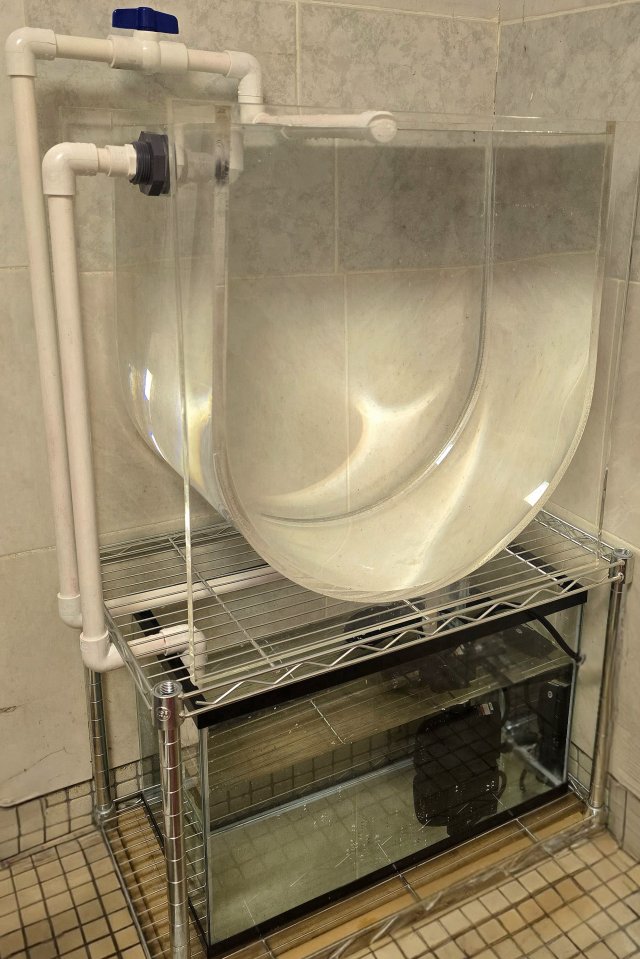
After 72 hours of curing, I can confirm that this seal is water tight. I went ahead and drilled the bugger and set it up in a spare shower in the basement just in case it explodes. It's been about two weeks, and it's about as sound as ever.
I apologize for the lengthy post. Thank you in advance!
For the last several years, I've been tonguing the idea of making my own kreisels. Local plastic fabricators are hesitant to make radiused bends, expensive, and looking to deal in extremely high volumes. It's somewhat of an ambitious pursuit, admittedly, and doubly so with my limited experience gluing acrylic lack of professional equipment. I'm looking to make these 15 gallon kreisels out of 1/2" thick acrylic - a bit overkill, sure, but I would like them to be robust, reliable, and preferably outlive me.


In summary, I have been (fairly) successful in heat bending the acrylic to a form I have made, as shown above. This was, likely, the most difficult part. However, in bending the acrylic, there is some minor distortion. This is to be expected merely by the shape, as a consequence of the bend, the outer edge and inner are displaced to the tune of a few tenths of a millimeter. Not much, but significant enough to cause issues with solvent welding. I have attempted to sand the edges flush, but I can't seem to get them perfect - at least, not to the degree of precision needed for the capillary response to carry a solvent.

The intention is to sandwich the bent acrylic between two sheets, where it will be suspended, like shown here. Bracing will be added later for additional support. I understand that this is an extremely unusual way to bond acrylic - the best analogy I can think of would be bonding acrylic baffles in a sump.
However, when I attempt the typical "pin" method with Weldon 4 solvent, the aforementioned distortion allows for bubbles to form around the perimeter of the bend - a massive amount, at that. Beyond this, pulling the pins out causes the bent acrylic to glide around on the surface. Yuck.

^ I don't quite trust this with even the small volume of 15 gallons of water it holds.
On the other hand, I can get fairly nice seams using Weldon 40. Now, I'm extremely messy with it. Don't judge too harshly, I'm not looking to make a profession out of this.

I accomplish this by sanding the edge of the bent acrylic with 400 grit sandpaper (per the manufacturer's instructions) and applying a bead of Weldon 40 around the length of the acrylic, then flipping it over and setting it on top of the acrylic sheet, like shown below. Unfortunately, it isn't quite feasible to sand the sheet of acrylic.

I'm no artist, so hopefully these illustrations are adequate. This is, essentially, what the Weldon representative I spoke with informed me to do. However, I'm not certain they had much of any experience assembling aquariums.
The result is a fair seam, with no bubbles. However, I'm slightly worried about whether or not this is an appropriate use of this product. More specifically, I've seen earlier mentions of the Weldon 40 not being able to "bite" into the acrylic. The result is a seam that "looks good" but might be lacking structural integrity. For what it's worth, I tried my hardest to pull the sheets apart to no avail. However, I would love for someone who's more familiar with Weldon 40 to double-check my work and let me know their thoughts.
After 72 hours of curing, I can confirm that this seal is water tight. I went ahead and drilled the bugger and set it up in a spare shower in the basement just in case it explodes. It's been about two weeks, and it's about as sound as ever.

I apologize for the lengthy post. Thank you in advance!


