I finally got my tank put back together from when my neighbor dropped it carrying it in the house. Assuming there are no water leaks, I'll get started on the stand in a couple of days. I have some questions regarding the overflow box and the return line.
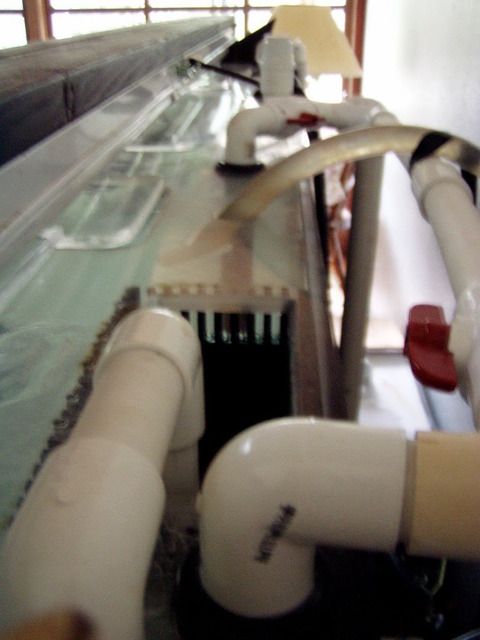
First, the overflow box. The tank is drilled with 3 holes (2 for drain and 1 for return) in the center. The overflow box was mounted in the center of the tank (the very middle, 'center overflow' style). I don't like this at all because I feel it takes away from viewing and is distracting. I want to move it to the center of the back wall.
I've made a drawing kind of representing what I want to do. Do you guys forsee any problems with doing it like the drawing? Will I need to worry about the drain pipes moving around? Check out the drawing below (top is before, bottom is how I want to do it)...

Now, on to the return line. Like I said above, the tank is drilled with 3 holes in the bottom. How should I run the return line. I guess the two options I'm considering are: 1. Run it into the overflow box like the 'after' picture in the drawing, and then up and over the box back into the tank (more head loss this way, but easier). Or, 2. Construct an undergravel jet type setup (less head loss but more complicated).
So with regards to the return line, what would you do and why would you do it that way and how would you go about doing it?
I'm open to any and all suggestions and/or comments. Thanks very much in advance for the help. And thanks for this great forum.
First, the overflow box. The tank is drilled with 3 holes (2 for drain and 1 for return) in the center. The overflow box was mounted in the center of the tank (the very middle, 'center overflow' style). I don't like this at all because I feel it takes away from viewing and is distracting. I want to move it to the center of the back wall.
I've made a drawing kind of representing what I want to do. Do you guys forsee any problems with doing it like the drawing? Will I need to worry about the drain pipes moving around? Check out the drawing below (top is before, bottom is how I want to do it)...
Now, on to the return line. Like I said above, the tank is drilled with 3 holes in the bottom. How should I run the return line. I guess the two options I'm considering are: 1. Run it into the overflow box like the 'after' picture in the drawing, and then up and over the box back into the tank (more head loss this way, but easier). Or, 2. Construct an undergravel jet type setup (less head loss but more complicated).
So with regards to the return line, what would you do and why would you do it that way and how would you go about doing it?
I'm open to any and all suggestions and/or comments. Thanks very much in advance for the help. And thanks for this great forum.

")