A special thanks to Eric and Alex at Vanstar for hooking this monster tank up. I've been searching for a 6' x 3' x 2' acrylic tank for awhile and I knew I had to have this one as soon as I saw it at their shop. A few weeks later and it was on the way home. Also, a special thanks to Jay and his buddies for helping load this thing into our van.
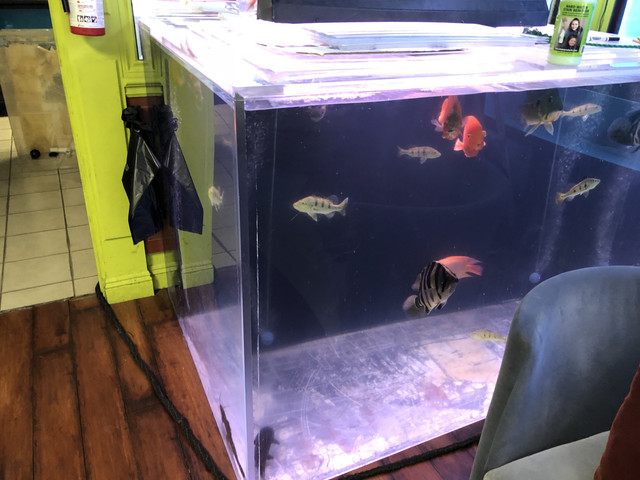
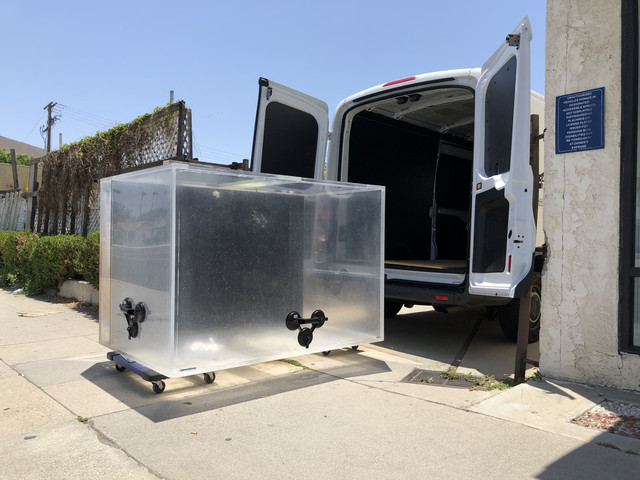
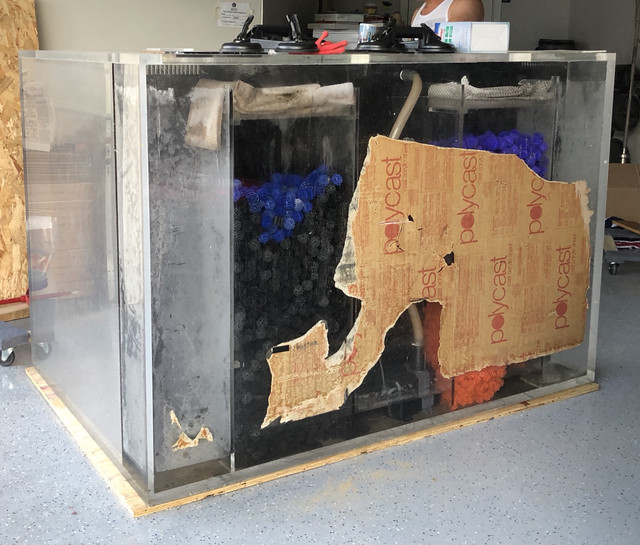
So, this is a 71" x 48" x 48" TruView Aquasystem tank with a built in sump. The front and back are 1.25" acrylic and the rest is 1". Internal volume wise, it measures 630 gallons with 95 gallons of that comprising the integrated sump.
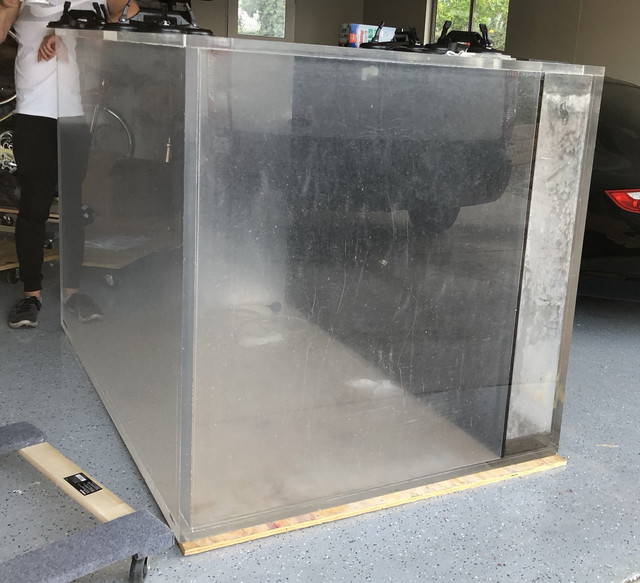
I'm hoping to keep this log so I can keep my many questions contained in a single thread. I haven't found much info on this type of tank and specifically on converting an integrated sump into a K1 fluidized moving bed system. I've spent the past few weeks researching the ideal setup for this AIO and I'll begin wet sanding/buffing this weekend.
I currently have a planted 150g with 60g sump, FX6, and 2215 that houses my Jardini, ITT & NTT Dats, a Spotted Pike Characin, Endli & Ornate Bichir, and Irwini Cats. The plan is for more Dats and Cichla.
I'm hoping I can lean on the collective knowledge of this forum to help me with my build.
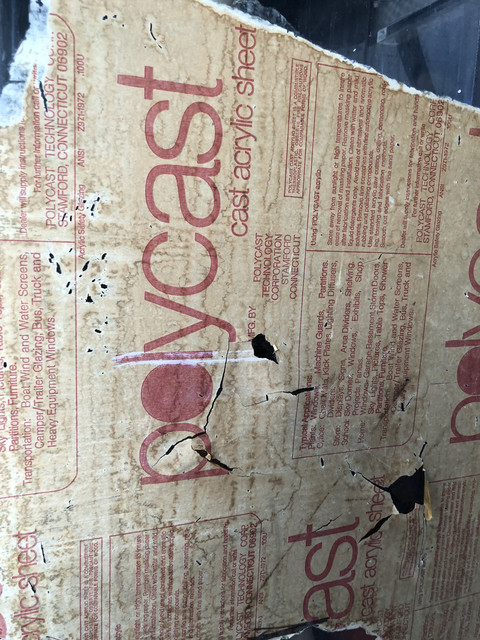
First, any suggestions on getting this old protective paper off the back? I've tried GooGone (on a small corner just in case it causes hazing/problems) and a razor blade (gently), but have been unsuccessful. I have a RO palm sander, 800 - 2500 grit sandpaper, and Novus 1 - 3 for the rest of the tank, but would prefer not to go through the whole process on the back since it will not be visible and I won't be able to refinish the inside of the sump anyway because of the depth and limited access through the cutouts.
Next, I planned on getting a nice 18" steel stand since this was going into my living room. Once my wife saw the size (it's bigger in real life than when planning with a tape measure) I've now decided (through not so subtle coaxing) to keep it in the garage and apply the funds elsewhere. Therefore, I plan on doing a simple concrete block stand two high, stacked horizontally holes up, for a total height of 16" inches (16" x 8" x 8" blocks from HD) with a 3/4 plywood sheet on top. Does this sound like the right configuration?
First problem is leveling since my garage is a bit uneven where I plan to place it. Can I shim under concrete blocks? If so, wood or metal? Any pointers? Next, is design. Should I make a full bed of concrete blocks or just support all the way around the edges and down the middle every 2'? My main concern is structural and that it's level over looks at this point.
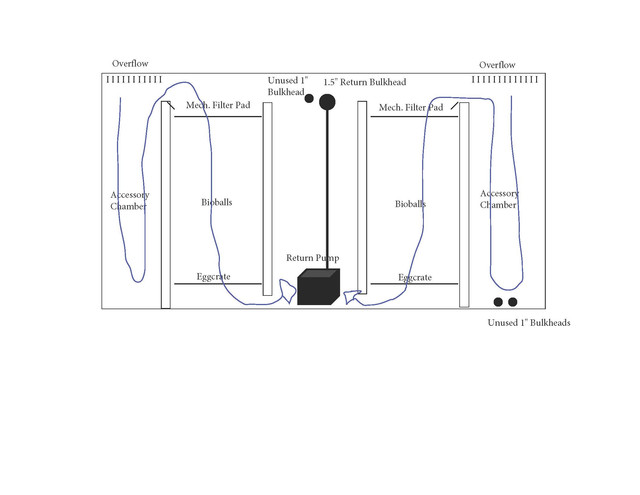
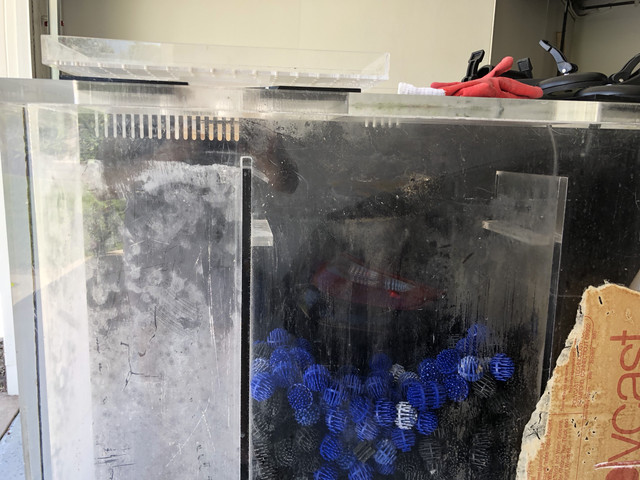
Next, is the AIO integrated sump. Here's a picture of the stock setup. Water comes in through the weir and drops unfiltered into an accessory chamber. It then flows over into the next chamber where it goes through mechanical filtration pads and then flows down through bioballs. Then it goes to the return pump chamber, through the pump, and back to the tank. My issue is that I feel like the accessory chambers are wasted space (since this sump already cuts into the interior footprint of the tank). I plan on adding two 300w heaters to the return pump chamber.
Here's a picture of my proposed plan.
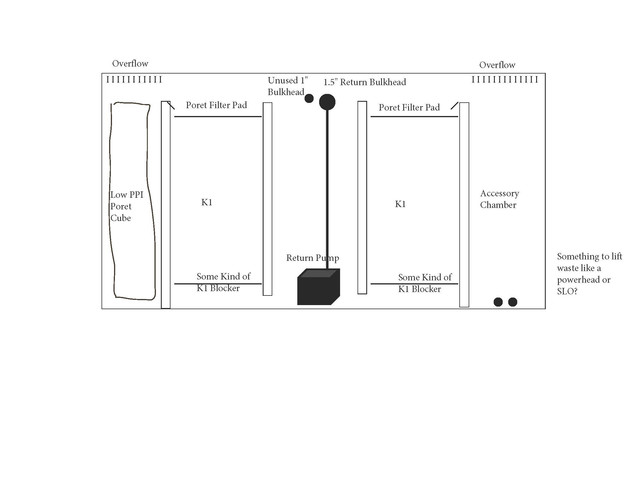
Would you recommend a 39" Poret Cube in the accessory chamber? Maybe with a Jetlifter overflowing directly onto the mechanical filter pads just to use that wasted space? Any other creative use of the two accessory chambers?
Next, I have 1 cu. meter of K1 ready for bio but I need something to keep it from getting into the return pump chamber. Egg crate is too big. Any suggestions? Low PPI Poret perhaps? Bioballs with egg crate on top? Anything available from HD or Lowes?
Next, there's a second unused 1" bulkhead next to the 1.5" return bulkhead. Any creative ideas for that? Would a second return pump be necessary? I'd imagine both pumps would go out in the event of a power failure, but maybe just in case the main pump fails? I'd like to keep it simple just for the fact that access will be difficult after setup, but if it's worth the effort then I'm all for it.
Finally, there are two 1" bulkhead holes drilled very close to the bottom of the right accessory chamber. I'm planning either bare bottom or slate so I'd like to somehow direct waste into these two holes (hopefully to minimize vacuuming a 48" tall tank) and up towards the mechanical filter pads. Any creative suggestions? I've looked into a SLO, a powerhead directed up, or an inline pump with return right to the filter pad, but could use some ideas. Access to the bottom of the sump is near impossible and even getting a bulkhead plug in there will be difficult.
I apologize for the wall of text, but I've researched a ton and these issues remain unclear or unresolved. Thanks!


So, this is a 71" x 48" x 48" TruView Aquasystem tank with a built in sump. The front and back are 1.25" acrylic and the rest is 1". Internal volume wise, it measures 630 gallons with 95 gallons of that comprising the integrated sump.

I'm hoping to keep this log so I can keep my many questions contained in a single thread. I haven't found much info on this type of tank and specifically on converting an integrated sump into a K1 fluidized moving bed system. I've spent the past few weeks researching the ideal setup for this AIO and I'll begin wet sanding/buffing this weekend.
I currently have a planted 150g with 60g sump, FX6, and 2215 that houses my Jardini, ITT & NTT Dats, a Spotted Pike Characin, Endli & Ornate Bichir, and Irwini Cats. The plan is for more Dats and Cichla.
I'm hoping I can lean on the collective knowledge of this forum to help me with my build.
First, any suggestions on getting this old protective paper off the back? I've tried GooGone (on a small corner just in case it causes hazing/problems) and a razor blade (gently), but have been unsuccessful. I have a RO palm sander, 800 - 2500 grit sandpaper, and Novus 1 - 3 for the rest of the tank, but would prefer not to go through the whole process on the back since it will not be visible and I won't be able to refinish the inside of the sump anyway because of the depth and limited access through the cutouts.

Next, I planned on getting a nice 18" steel stand since this was going into my living room. Once my wife saw the size (it's bigger in real life than when planning with a tape measure) I've now decided (through not so subtle coaxing) to keep it in the garage and apply the funds elsewhere. Therefore, I plan on doing a simple concrete block stand two high, stacked horizontally holes up, for a total height of 16" inches (16" x 8" x 8" blocks from HD) with a 3/4 plywood sheet on top. Does this sound like the right configuration?
First problem is leveling since my garage is a bit uneven where I plan to place it. Can I shim under concrete blocks? If so, wood or metal? Any pointers? Next, is design. Should I make a full bed of concrete blocks or just support all the way around the edges and down the middle every 2'? My main concern is structural and that it's level over looks at this point.
Next, is the AIO integrated sump. Here's a picture of the stock setup. Water comes in through the weir and drops unfiltered into an accessory chamber. It then flows over into the next chamber where it goes through mechanical filtration pads and then flows down through bioballs. Then it goes to the return pump chamber, through the pump, and back to the tank. My issue is that I feel like the accessory chambers are wasted space (since this sump already cuts into the interior footprint of the tank). I plan on adding two 300w heaters to the return pump chamber.


Here's a picture of my proposed plan.

Would you recommend a 39" Poret Cube in the accessory chamber? Maybe with a Jetlifter overflowing directly onto the mechanical filter pads just to use that wasted space? Any other creative use of the two accessory chambers?
Next, I have 1 cu. meter of K1 ready for bio but I need something to keep it from getting into the return pump chamber. Egg crate is too big. Any suggestions? Low PPI Poret perhaps? Bioballs with egg crate on top? Anything available from HD or Lowes?
Next, there's a second unused 1" bulkhead next to the 1.5" return bulkhead. Any creative ideas for that? Would a second return pump be necessary? I'd imagine both pumps would go out in the event of a power failure, but maybe just in case the main pump fails? I'd like to keep it simple just for the fact that access will be difficult after setup, but if it's worth the effort then I'm all for it.
Finally, there are two 1" bulkhead holes drilled very close to the bottom of the right accessory chamber. I'm planning either bare bottom or slate so I'd like to somehow direct waste into these two holes (hopefully to minimize vacuuming a 48" tall tank) and up towards the mechanical filter pads. Any creative suggestions? I've looked into a SLO, a powerhead directed up, or an inline pump with return right to the filter pad, but could use some ideas. Access to the bottom of the sump is near impossible and even getting a bulkhead plug in there will be difficult.
I apologize for the wall of text, but I've researched a ton and these issues remain unclear or unresolved. Thanks!


