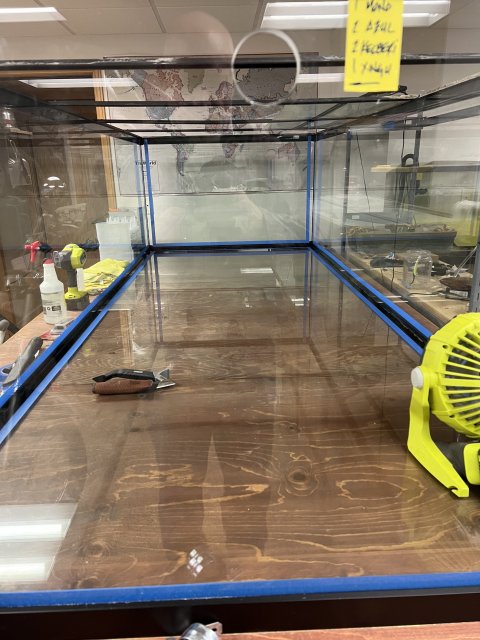
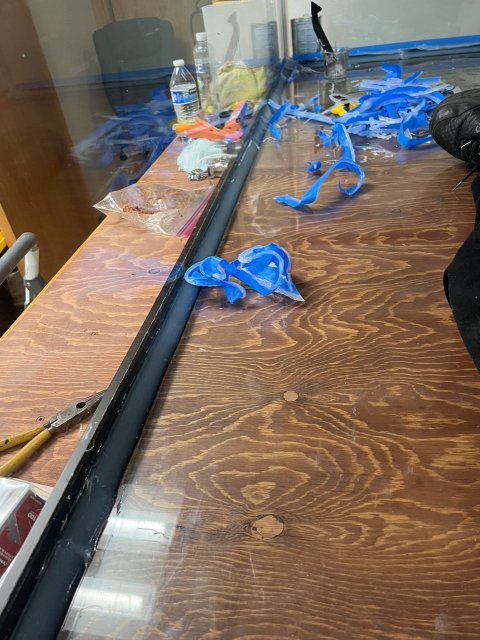
800g Tank Reseal (for the 2nd time)!

Trouser Cough

Aimara
MFK Member
Nov 7, 2022
919
1,058
134
I think I may have found at least something to wonder about.

The floor of the tank is where the moisture had gathered. The tank is 10' long and it's right about the midpoint when I'm in the tank working on it. So the bottom pane is flexing downward which I suppose is to be expected. IIRC the tanks are on their side at the plant during the sealing process so there wouldn't be a load on that pane. I'm about 220# or so and that pane separation is around 1/16th of an inch when the floor of the tank is flexed downward based on me being on it.

Just thinking out loud I don't see that that's necessarily an issue as the silicone will still be fluid when I climb out of the tank. It may have been much less so when I applied the SCS1200 though.

And yes, alcohol night. The thought had crossed my mind more than once!
 
  • Like
Reactions: phreeflow

Backfromthedead

Potamotrygon
MFK Member
Jul 12, 2017
4,741
6,512
164
Fredericksburg va
The fact that the bottom is flexing up to 1/16" under your body weight is uh...not encouraging. How much could it be flexing when filled with all that water?
 

Trouser Cough

Aimara
MFK Member
Nov 7, 2022
919
1,058
134
I wonder the same. There’s no concentrated load when full so there’s that. There’s also a likelihood (some likelihood) that the design takes into consideration silicone’s inherent flexibility.

I did a bad job of sealing this once before and it lasted for a couple years. We know it works I’m probably being a little picky when it comes to scrutinizing every possible flaw. I hope.
 

Backfromthedead

Potamotrygon
MFK Member
Jul 12, 2017
4,741
6,512
164
Fredericksburg va
I wonder the same. There’s no concentrated load when full so there’s that. There’s also a likelihood (some likelihood) that the design takes into consideration silicone’s inherent flexibility.

I did a bad job of sealing this once before and it lasted for a couple years. We know it works I’m probably being a little picky when it comes to scrutinizing every possible flaw. I hope.
Right, we know it works...but for how long? You can only stretch the structural seams so much for so long before they're compromised. Worst case scenario that's your problem and your new reseals just keep stretching apart there after a short time.

Is there any way to shore up that middle span? Is the bottom glass panel actually up off the stand and sitting on the trim picture frame style? I know glass tanks are made like that all the time but I would think yours should be fully supported by the stand every square inch given its larger than standard size. What is the trim made from?
 

Trouser Cough

Aimara
MFK Member
Nov 7, 2022
919
1,058
134
I agree w/ you, BFTD. My challenge is that there's no limit to the number of improvements I *could* make but some of them (like lifting the tank to shore up the bottom plate) would require significant time, effort and expense for a problem that may exist or may not. Just the tank alone w/ nothing in it tips in around 1300 pounds so lifting it to modify the underside would be a big deal.

I am moving forward under the following premise:

- When I bought the tank it had been sitting dry for a few years.

- I did a poor job of stripping the sealant and replacing same but it did work for a couple years and I did find my mistake.

- My second reseal was w/ SCS1200 which introduced challenges I was unprepared for and resulted in a compromised seal.

- My third reseal will be this one and I have never prepped any tank for a reseal w/ even 10% of the effort I've given this tank.

If I had to be honest w/ myself it's also true that I want to see progress, badly. I know how I am about long term projects and once what had been fun transitions to an ongoing obligation... I start to lose steam and it's hard to get that back. My fish deserve better.

The interior of the tank is immaculate in the roughly 40' of seam area that will receive a bead. I'm going to head out to lunch at my favorite Thai restaurant and make a serious effort to get my zen on. I'll make notes, I'll bother myself w/ a zillion 'what-ifs' and I will practice a few of my favorite bits of strong language. When I come back it will be game on.

I'll be laying a forty foot fatty tonight.

As an interesting side note I picked up a frameless 180g to use as a sump for the 800. I have no clue what kind of voodoo holds that thing together but I do know that if it ever lets go there would be little chance of a shade tree hobbyist like myself putting that little devil back to right. In the future I'll leave those rimless and frameless tanks for others with a greater tolerance for Stuff Hits the Fan events.

A helpful tip:

If you're going to use 99% alcohol make sure you clean the seam prior to masking the tank. That stuff eats 3M masking tape like candy.


IMG_7849.jpeg
 

Trouser Cough

Aimara
MFK Member
Nov 7, 2022
919
1,058
134
Mkay... a quick update and then it's back to work.

I've learned several things in this process and I'll share a few of them here. Ask any question you like and I'll give you my experience but the short version is that there are too many moving parts in this process to document them all as well as I'd like.

Most of the comments below apply to the siliconing process. For me everything pertaining to silicone was a big deal. The stripping of the old stuff and getting the glass in those areas perfectly clean was not the cakewalk it would seem and then laying a bead is not exactly hassle free either.

- Wear gloves. I've got a few boxes of them laying around but have a bad habit of finding myself seriously motivated and right then I'll drop what I'm doing and dive straight in. I forgot the gloves when the mood struck the first time. Did it again the second. Don't do that. Oversharing for a moment note that a bathroom break prior to this size job is a good idea, particularly if you forget gloves.

- Quick drying silicones like SCS1200 or similar might be great for small tank rebuilds or pros. In my case it's a roughly 40' bead and you're not going to get that done quickly enough to pull your masking cleanly. When the bead is complete and you go to remove your masking the tape will peel away sections of the bead and you won't know if it was too much or not (until it fails).

- On my third reseal I used GE Silicone 1. It is supposedly a slow cure product but it's still too quick for pulling the masking off after having set a 40' bead. jjohnwm jjohnwm I should have taken your advice about no masking. With a little practice you can lay in impressive fat bead w/ zero need for masking at all.

If you run into a partial cure issue prior to pulling the masking...

STOP

Don't pull the masking.

Wait for the material to completely cure and then use a razor blade to cut the edge of the silicone where the masking is... then pull the masking up. Note that masking does not like to come off cleanly if it's been in place for a few days so bear that in mind.

- 3M makes a painter's mask the call an Odor Respirator. It has a layer of carbon between two filtration surfaces and it makes the job much nicer. I noticed no odor while using that mask and when I took it off there was an immediate sense of chemical burn in my nostrils. They're cheap masks and an xlnt idea for this kind of task.

- The footprint of this tank is 10' x 4' which is not enough room. Be careful about turning around while laying the bead as there's a high risk of putting your shoe directly into the bead on the other side of the tank that you just set.

What did I learn?

I learned that if I have to do this again it'll be a heck of a lot easier than it has been up to this point. I've also learned that I no longer like masking large tanks. The caulk dries too quickly and that introduces another point of failure.

The tank is done. I have no idea if it'll hold water this time or not but I am guessing it probably will.

In a few days I'll trim the tape out and the following morning will fill the tank. Morning... just in case it might need to be drained right away.

One other thing that merits mention. Fin high WC's make fish feisty and when they're in tanks too small to allow them to get away from others in the tank it sometimes seems like smaller WC's might be better. Doubt it's true but watching some bother others for fun takes a little getting used to.
 

Trouser Cough

Aimara
MFK Member
Nov 7, 2022
919
1,058
134
This whole thing about masking is really oriented toward much smaller tanks and much smaller silicone beads. It makes for a pretty completed tank but that's freakishly unimportant in the grand scheme. What it doesn't do is more important and that is that it doesn't stay completely adhered and pulls away during removal of the mask.

I'm learning a lot in this process and two important aspects are:

- Strongly consider ditching the mask idea. Large tank mfg's often don't use masking and there's a good reason for that.

- If you can't help yourself and must use a mask, let it cure before you pull the mask and then cut the masking out.

It's turning out pretty but that's completely unimportant. See pic below.IMG_7862.jpeg
 

Backfromthedead

Potamotrygon
MFK Member
Jul 12, 2017
4,741
6,512
164
Fredericksburg va
I just wait until completely cured, 2-3 weeks usually to remove the tape or until the whole bead all around is "firm". By that time the silicone should be completely adhered to the glass and it will usually break off cleanly right on the tape line. Still have to be cautious though. I had had some similar problems to your earlier one (ripping out some silicone while pulling the tape) if I tried to remove it a couple days after building. For instance just by looking at it (I'd love to finger that bead though) I'll bet it still feels kinda squishy.
 
  • Like
Reactions: jjohnwm

Trouser Cough

Aimara
MFK Member
Nov 7, 2022
919
1,058
134
I'll bet it still feels kinda squishy.
Totally! I've relied on that squish factor in two spots. Where the material appears to have either pulled away or otherwise has a void inside the bead I've pierced the skin and poked around at the void until the uncured interior material moved around and filled the low spot.

I know that sounds like it shouldn't be necessary or possible so I don't have the highest hopes for this seal job either... but I know I'll be pretty dang good at this soon.
 

jjohnwm

Sausage Finger Spam Slayer
MFK Member
Mar 29, 2019
4,276
10,960
194
Manitoba, Canada
Totally! I've relied on that squish factor in two spots. Where the material appears to have either pulled away or otherwise has a void inside the bead I've pierced the skin and poked around at the void until the uncured interior material moved around and filled the low spot.

I know that sounds like it shouldn't be necessary or possible so I don't have the highest hopes for this seal job either... but I know I'll be pretty dang good at this soon.
I'd never trust "re-squished" silicone to hold if it were the actual structural seam...but for just an internal sealing seam I'm sure it won't be a problem.

When I was a youngster I had a part-time job working for an all-glass tank manufacturer. When he trusted me enough to actually allow me to build tanks myself, he made it very clear that I could use masking tape if I insisted, but that it was somewhere between cannibalism and voting Liberal in his estimation of vile things to do. Being an impressionable lad who wanted to keep my job, I quickly graduated away from masking tape for smaller tanks up to about 30 gallons or so. We had numerous jigs on hand that held the glass panes perfectly square and stable, so assembling a tank and applying the internal bead was a very fast and easy job.

I never fully mastered the art of not applying a separate internal bead. My boss assembled his tanks with such a carefully-metered assembly bead, applied (fast!) with a manual gun, that the excess squeezed into the tank provided the perfect amount to clean up with a quick swipe of a moistened finger...even faster.

On the rare occasions when I was entrusted to build a larger tank, 100 gallons or more, I was allowed to apply careful masking all around but I had to remove each strip of masking immediately after that bead was applied, before progressing to the next. The boss would not tolerate letting the silicone sit for more than a minute or two before removing the tape. I am assuming that the stuff we used was the same product that is now referred to as GE Silicone I but it came in the large sausage casings rather than the smaller rigid tubes most of us use today.

Ignoring the time spent applying the masking tape, if I took more than 60 seconds to lay a 72 inch bead, concave it with my finger and then rip off two strips of masking tape...things became unpleasant quickly. :)
 
zoomed.com
hikariusa.com
aqaimports.com
Store