How I clean Eheim 2217 Filter
- Thread starter deeda
- Start date
Cleaning hoses, especially long runs, can be accomplished easily in a couple different ways. A flexible tube brush of the appropriate diameter for your tubing size is usually the most effective way. You can also use a flexible wire or strong string tied to a piece of cloth.
If using the string method, first tie a weight (use a nut or fishing weight) to the string, drop it through the tubing, then tie the cloth or short brush to the string and pull it through. Using a double string allows you to pull the cloth back & forth, scrubbing the inside of the tubing.
If using the string method, first tie a weight (use a nut or fishing weight) to the string, drop it through the tubing, then tie the cloth or short brush to the string and pull it through. Using a double string allows you to pull the cloth back & forth, scrubbing the inside of the tubing.
I clean my hoses with some aquarium salt and tank water. I put a generous amount of salt and a little water in the hose, then shake it around. It works pretty well.
This will make normal water changes with 2217 much faster:
Get a Y splitter at lowes ($3.50) and the related adapters to attach to 1/2" tubing (aka output side size or 494 i believe) and hook it up before the double tap on the output side. Hook up your python or whatever you use to do water changes to one of the Y outputs, while normal operation of filter is on other Y output. All you do to go from normal operation to water change is bring the end of the python to the sink and switch the Y valve. Goes way faster than siphoning.
Then to fill tank back up, close the part of the Y that is attached to the filter, open the two others so water goes from your sink thru Y and straight out your spray bar. Remember add full tank dose of prime to tank first obviously.
Your post helped a lot!!! I had a broken impeller the first time. Replaced! But now the things just randomly leaks, everywhere!!! Connections are tight, impeller ok, cleaned X2. Idea's???
Could it be leaking at the top where it goes together-pump head? or the red ring on head leaks? silver clips leak? It's the only place I can possibly see that may do it but couldn't see exactly where coming from. It is Eheim 2217. Thanks, Susan
Could it be leaking at the top where it goes together-pump head? or the red ring on head leaks? silver clips leak? It's the only place I can possibly see that may do it but couldn't see exactly where coming from. It is Eheim 2217. Thanks, Susan
Can you identify exactly where the leak is coming from? If the head seal (red o-ring) is damaged or not seated properly, this could cause the problem.
There is also an o-ring seal on the fitting for the output that is located underneath the pump head cover and this could cause a leak that would weep between the cover and pump head.
There is also an o-ring seal on the fitting for the output that is located underneath the pump head cover and this could cause a leak that would weep between the cover and pump head.
This a repost of my original thread since the pics were lost due to Photobucket no longer allowing free 3rd party image linking.
1) Unplug the cord from the wall outlet.
2) Close all the disconnect valves on the input and output hoses.
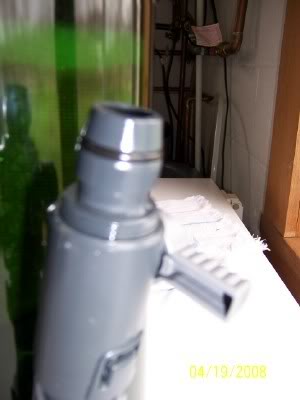
3) Take the filter to the sink to drain and
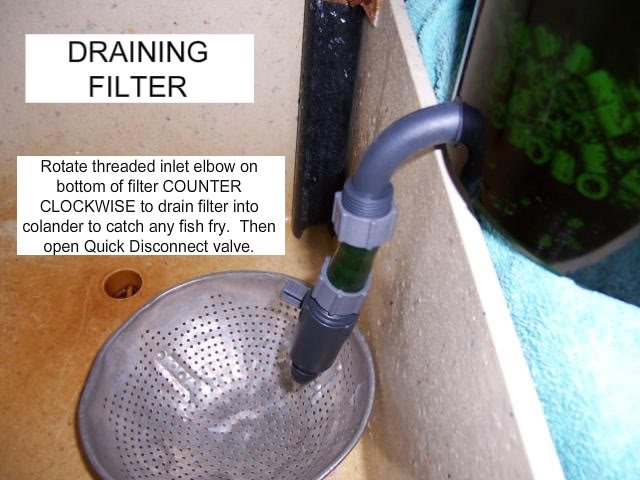
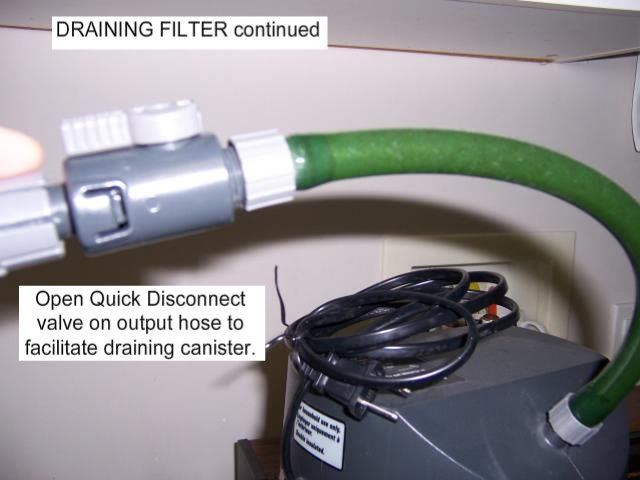
4) The output valve AND input valves must be open in order to drain the filter.
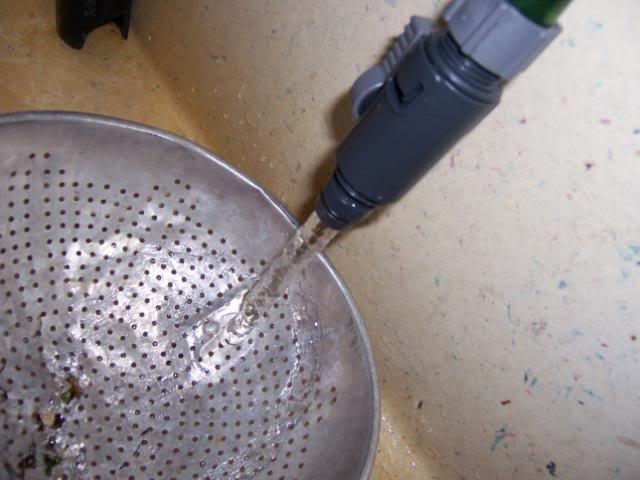
5) This picture shows the filter draining.
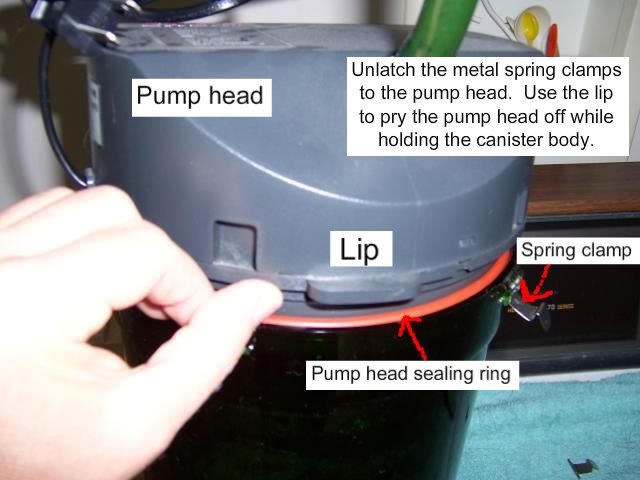
6) Once the filter is drained, unlatch the clips to remove the pump head and set the pump head aside to clean later.
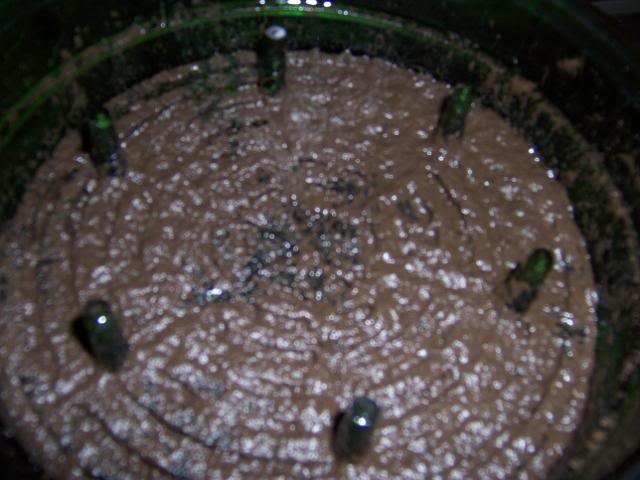
7) The filter was filthy and this is what the top lattice screen looked like when I removed the pump head from the canister. Remove the lattice screen and clean it using a soft brush or toothbrush.
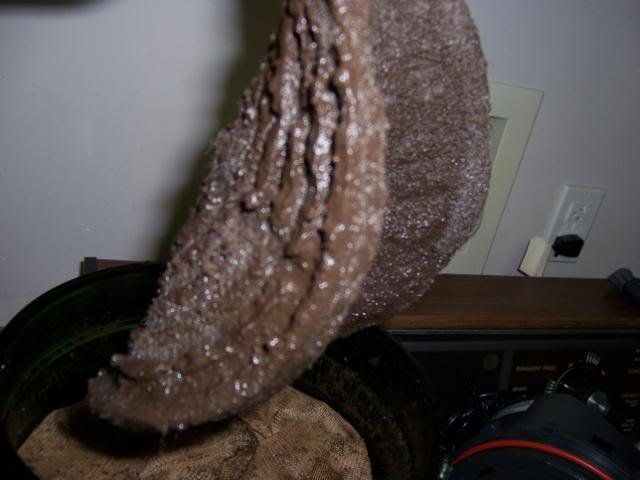
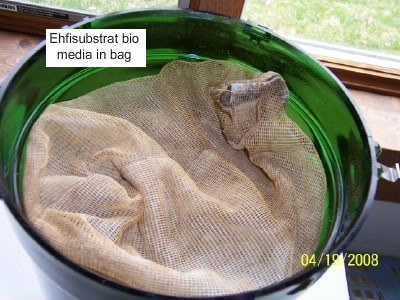
8) Remove the fine filter pad & rinse it if it is lightly soiled. This one was too dirty so I replaced it. Under the pad is the media bag that I keep the bio-media in. I'm using Eheim Substrat Pro.
9) I don't have a pic of this step but I put the bio-media and media bag in a pail of aquarium water to keep it wet while I clean the rest of the filter. I dunk it a few times to dislodge dirt and debris, changing the water until it remains clear.
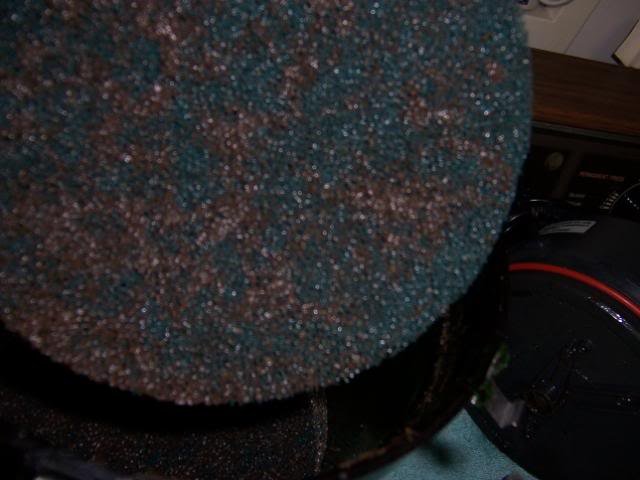
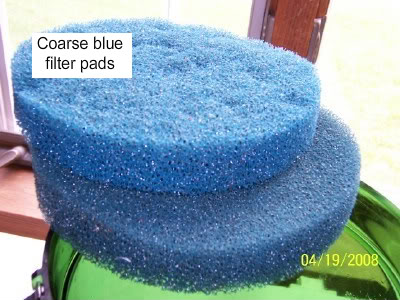
10) Clean the blue coarse pads using tap water & a hose sprayer to get all the gunk out. I have untreated well water but I don't think regular treated tap water will hurt anything. These pads can be used multiple times before needing to be replaced.
11) Clean the Ehfimech or ceramic tubes using tap water and a hose sprayer to remove gunk and debris or you can dump them in a pail and flush with water until clean. NOTE: Keep an eye out for any fry that might be hiding in here. I keep a small container of tank water & use a spoon to catch any fry I want to save.
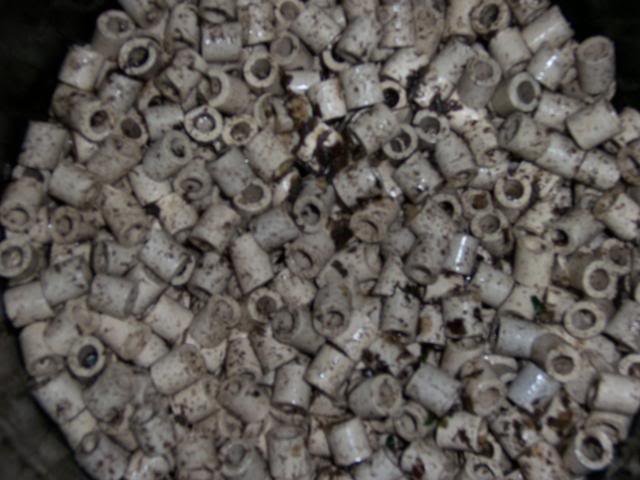
12) Remove the bottom lattice screen and clean with a soft brush. Rinse the canister body with water & a soft cloth. Clean the inlet fitting, hose and valve with a tube brush. Replace the bottom lattice screen with the legs/lugs facing down.
13) Now it's time to clean the pump head. This pic shows the pump cover in the latched position.
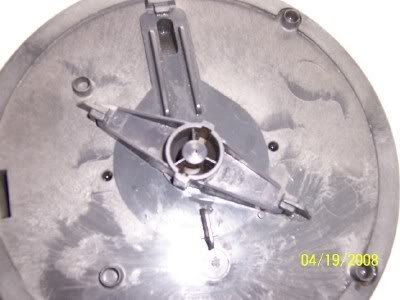
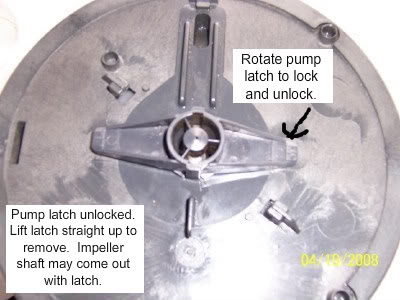
14) To gain access to the impeller, rotate the latch. You may need to press down lightly to turn it.
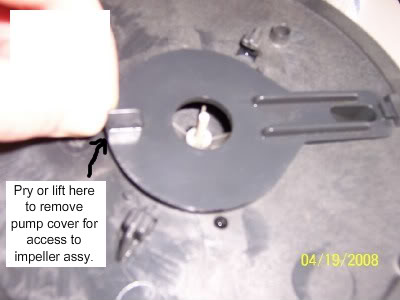
15) Lift the pump cover where shown. I use a pair of tweezers to pry the cover up and then lift it off.
16) Remove the impeller and ceramic shaft by lifting them straight up. Set these parts in a safe place to avoid breaking them. Clean the impeller cavity with a tube brush to remove debris.
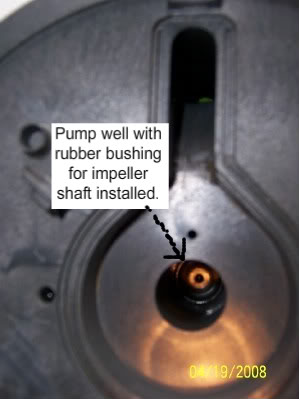
17) Clean the impeller with a toothbrush & carefully wipe the ceramic shaft with a soft cloth. Install the impeller shaft in the impeller cavity, making sure the rubber bushing/seat is still in the center cavity. NOTE: Sometimes this rubber bushing comes loose so verify it is in place as this centers the shaft in the cavity.
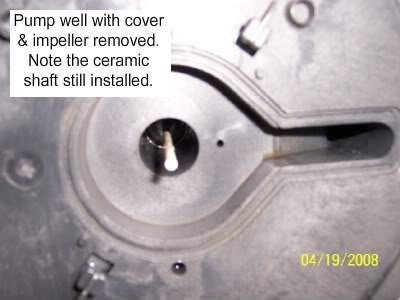
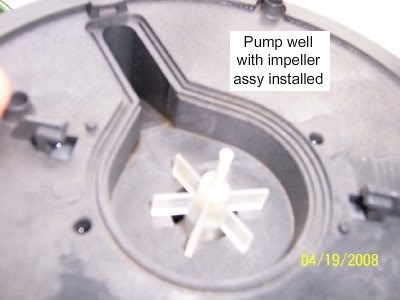
18) Slide the impeller onto the shaft. I don't show this step but do show the impeller installed in the impeller cavity.
19) Install the pump cover after cleaning it with a toothbrush as shown.
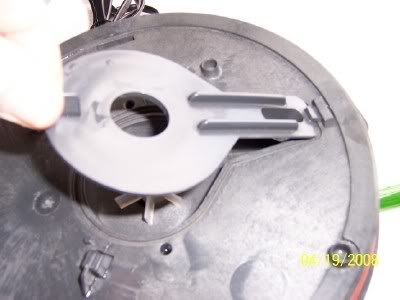
20) Clean the pump cover latch with a toothbrush. NOTE: Verify the 2nd rubber bushing is still installed in the latch. Center the latch over the pump cavity & impeller shaft, gently press it down & rotate it to the locked position.
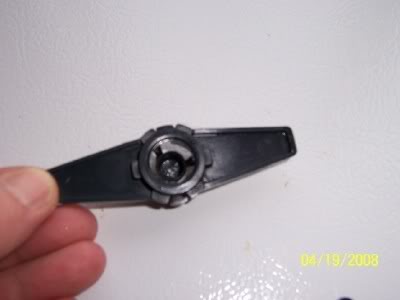
See Steps 14 and 13 to secure pump cover latch.
21) Clean the pump head with a damp soft cloth or brush. Remove and clean the o-ring with a damp soft cloth & apply some lube or grease to it before reinstalling it. NOTE: Verify the o-ring is not twisted or kinked and doesn't have any major nicks or cuts in it. The o-ring is a wear item and should be replaced if it doesn't seal properly.
22) Now it's time to put the filter media back in. Be sure the bottom lattice screen goes in first with the legs facing the bottom of the filter housing.
23) This is what the cleaned Eheim EhfiMech coarse media looks like.
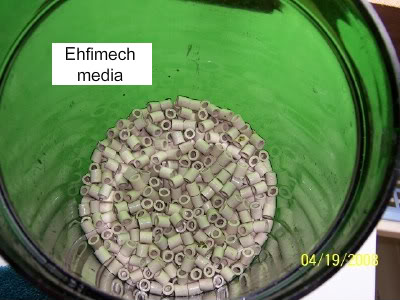
23) Install the coarse pads after cleaning or replacement.
25) Reinstall the bio media after cleaning.
Continued in next post.
1) Unplug the cord from the wall outlet.
2) Close all the disconnect valves on the input and output hoses.

3) Take the filter to the sink to drain and

4) The output valve AND input valves must be open in order to drain the filter.

5) This picture shows the filter draining.

6) Once the filter is drained, unlatch the clips to remove the pump head and set the pump head aside to clean later.

7) The filter was filthy and this is what the top lattice screen looked like when I removed the pump head from the canister. Remove the lattice screen and clean it using a soft brush or toothbrush.

8) Remove the fine filter pad & rinse it if it is lightly soiled. This one was too dirty so I replaced it. Under the pad is the media bag that I keep the bio-media in. I'm using Eheim Substrat Pro.

9) I don't have a pic of this step but I put the bio-media and media bag in a pail of aquarium water to keep it wet while I clean the rest of the filter. I dunk it a few times to dislodge dirt and debris, changing the water until it remains clear.
10) Clean the blue coarse pads using tap water & a hose sprayer to get all the gunk out. I have untreated well water but I don't think regular treated tap water will hurt anything. These pads can be used multiple times before needing to be replaced.

11) Clean the Ehfimech or ceramic tubes using tap water and a hose sprayer to remove gunk and debris or you can dump them in a pail and flush with water until clean. NOTE: Keep an eye out for any fry that might be hiding in here. I keep a small container of tank water & use a spoon to catch any fry I want to save.

12) Remove the bottom lattice screen and clean with a soft brush. Rinse the canister body with water & a soft cloth. Clean the inlet fitting, hose and valve with a tube brush. Replace the bottom lattice screen with the legs/lugs facing down.
13) Now it's time to clean the pump head. This pic shows the pump cover in the latched position.

14) To gain access to the impeller, rotate the latch. You may need to press down lightly to turn it.

15) Lift the pump cover where shown. I use a pair of tweezers to pry the cover up and then lift it off.

16) Remove the impeller and ceramic shaft by lifting them straight up. Set these parts in a safe place to avoid breaking them. Clean the impeller cavity with a tube brush to remove debris.

17) Clean the impeller with a toothbrush & carefully wipe the ceramic shaft with a soft cloth. Install the impeller shaft in the impeller cavity, making sure the rubber bushing/seat is still in the center cavity. NOTE: Sometimes this rubber bushing comes loose so verify it is in place as this centers the shaft in the cavity.

18) Slide the impeller onto the shaft. I don't show this step but do show the impeller installed in the impeller cavity.

19) Install the pump cover after cleaning it with a toothbrush as shown.

20) Clean the pump cover latch with a toothbrush. NOTE: Verify the 2nd rubber bushing is still installed in the latch. Center the latch over the pump cavity & impeller shaft, gently press it down & rotate it to the locked position.

See Steps 14 and 13 to secure pump cover latch.
21) Clean the pump head with a damp soft cloth or brush. Remove and clean the o-ring with a damp soft cloth & apply some lube or grease to it before reinstalling it. NOTE: Verify the o-ring is not twisted or kinked and doesn't have any major nicks or cuts in it. The o-ring is a wear item and should be replaced if it doesn't seal properly.
22) Now it's time to put the filter media back in. Be sure the bottom lattice screen goes in first with the legs facing the bottom of the filter housing.
23) This is what the cleaned Eheim EhfiMech coarse media looks like.

23) Install the coarse pads after cleaning or replacement.

25) Reinstall the bio media after cleaning.

Continued in next post.
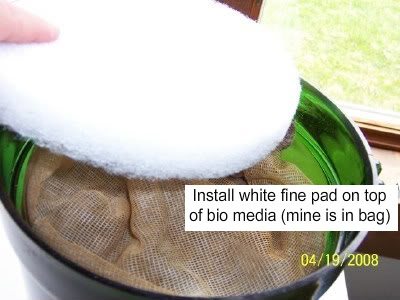
26) Install the fine media after cleaning or replacement.
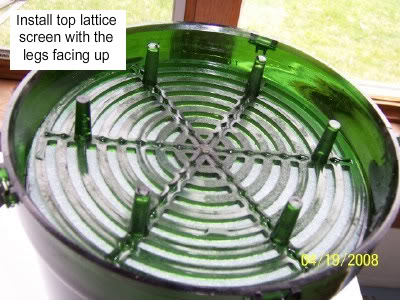
27) Install the top lattice screen as shown.
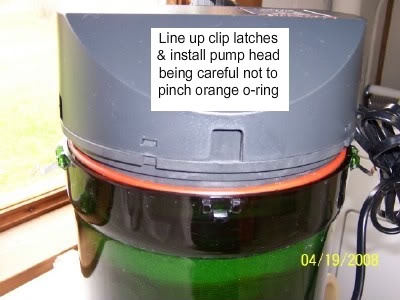
28) Install the pump head being careful not to pinch the o-ring. I DO NOT add or fill the canister with water when doing this step. I find that the filter will purge the air better when it has no water in it. I am missing a clip in this pic but you get the idea.
That's it, your done cleaning the filter.
I did not show any pictures of how I prime the canister and if I did not remove and clean the intake & output hoses, they are still full of water. Be sure the Quick Disconnect valve o-rings are in good condition (see Step 2, pic 1). Lightly lube or grease the o-rings.
Raise the spray-bar or discharge outlet so it is above the water line. Reconnect the Q.D. valves for the Output hose first. Open the Output valves to allow any water in the hose to enter the canister filter. NOTE: Be sure the spray-bar or discharge outlet is not facing upwards yet.
Now connect the input/suction Q.D. valves and open them. This allows water from the aquarium to start filling the canister with water. The air will be purged from the canister via the spray-bar or discharge outlet & it will now fill the canister with water.
Plug the filter into the wall outlet. Now you can re-position the spray-bar/discharge end underwater, if that is how you want it. There may still be some air trapped in the filter and this may go away after a few minutes. You can briefly unplug the filter from the wall outlet to allow additional air to rise to the aquarium rim and then plug it back in.
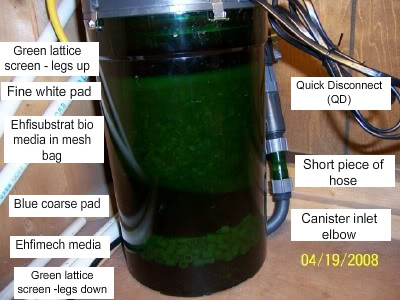
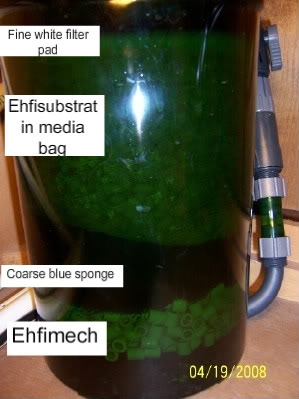
This is how my filter looks installed under my aquarium stand. It shows how the media is stacked in the canister.
I hope that this has been a helpful pictorial on cleaning this filter. Hopefully these pics will be sticking around this time!!!
Please be aware that I have untreated well water so there is NO chlorine or chloramine in my tap water. I know it is often recommended to not use water that has disinfectant added at the water plant to clean filter media so keep that in mind. IMO, a quick rinse in city tap water should have minimal impact on the good bacteria in your filter, especially if you have more than one filter or a low bio-load in the aquarium.
Dee

27) Install the top lattice screen as shown.

28) Install the pump head being careful not to pinch the o-ring. I DO NOT add or fill the canister with water when doing this step. I find that the filter will purge the air better when it has no water in it. I am missing a clip in this pic but you get the idea.

That's it, your done cleaning the filter.
I did not show any pictures of how I prime the canister and if I did not remove and clean the intake & output hoses, they are still full of water. Be sure the Quick Disconnect valve o-rings are in good condition (see Step 2, pic 1). Lightly lube or grease the o-rings.
Raise the spray-bar or discharge outlet so it is above the water line. Reconnect the Q.D. valves for the Output hose first. Open the Output valves to allow any water in the hose to enter the canister filter. NOTE: Be sure the spray-bar or discharge outlet is not facing upwards yet.
Now connect the input/suction Q.D. valves and open them. This allows water from the aquarium to start filling the canister with water. The air will be purged from the canister via the spray-bar or discharge outlet & it will now fill the canister with water.
Plug the filter into the wall outlet. Now you can re-position the spray-bar/discharge end underwater, if that is how you want it. There may still be some air trapped in the filter and this may go away after a few minutes. You can briefly unplug the filter from the wall outlet to allow additional air to rise to the aquarium rim and then plug it back in.
This is how my filter looks installed under my aquarium stand. It shows how the media is stacked in the canister.

I hope that this has been a helpful pictorial on cleaning this filter. Hopefully these pics will be sticking around this time!!!
Please be aware that I have untreated well water so there is NO chlorine or chloramine in my tap water. I know it is often recommended to not use water that has disinfectant added at the water plant to clean filter media so keep that in mind. IMO, a quick rinse in city tap water should have minimal impact on the good bacteria in your filter, especially if you have more than one filter or a low bio-load in the aquarium.
Dee

Last edited:


