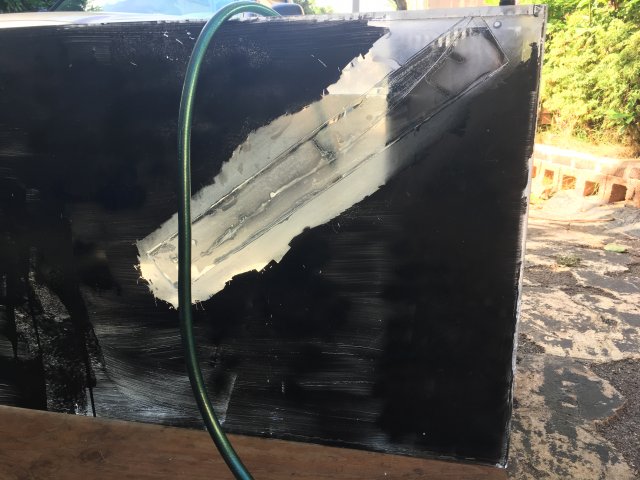
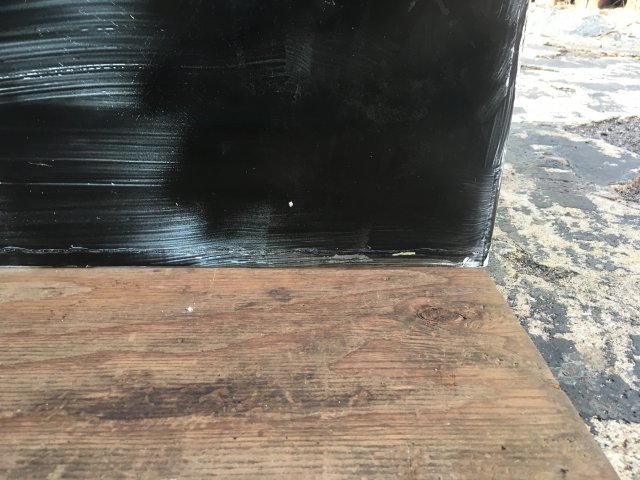
Whew...thats a doozey :/... def salvagable tho. did you drill the crack on end to prevent it from spreading before putting the patch on? Its possible they can still run under a patch if you dont drill a hole through the material to stop it. Cant really work backwards now as im sure those patches are adhered fairly well with the #16. #16 isnt that strong alone but u improved its strength with patches inside and out. Kinda too late to use #40 at this point. Id do a leak test, let er ride for a week full and see what happens. If the patch comes off in the future re-repair with #40. Ive done alot of patch work with #16 in my earlier years...some hold out well...some dont... always a craps shoot. Youll be able to watch the glue under those patches... water will seep in if there not stuck on well turning white. if they stay clear you should b ok for a while.
Weld-on #40 and #42
- Thread starter wednesday13
- Start date
thanks for taking a look at exactly what it is a doozy lol. Yes i did drill a hole at the end of the crack to stop it from spreading. I'll filler up and hope and pray that she holds ! thank you for all your help.Whew...thats a doozey :/... def salvagable tho. did you drill the crack on end to prevent it from spreading before putting the patch on? Its possible they can still run under a patch if you dont drill a hole through the material to stop it. Cant really work backwards now as im sure those patches are adhered fairly well with the #16. #16 isnt that strong alone but u improved its strength with patches inside and out. Kinda too late to use #40 at this point. Id do a leak test, let er ride for a week full and see what happens. If the patch comes off in the future re-repair with #40. Ive done alot of patch work with #16 in my earlier years...some hold out well...some dont... always a craps shoot. Youll be able to watch the glue under those patches... water will seep in if there not stuck on well turning white. if they stay clear you should b ok for a while.
Nice, glad to hear u drilled the crack on end. U did a pretty good job if this is ur 1st repair. Some patches arent pretty lol...but its good u used a thick material for the them, #4 first and then #16. I have a 450g cracked end to end on the bottom thats been patched and running around 6 yrs now. Its leaked a cple times over the years but nothin more glue didnt fix. Hope urs holds out for ya!thanks for taking a look at exactly what it is a doozy lol. Yes i did drill a hole at the end of the crack to stop it from spreading. I'll filler up and hope and pray that she holds ! thank you for all your help.
Pretty disappointed .... Just like my pm to u the bottom right has water seeping. After running my finger by it, my finger is a little damp. The patch itself seems to be holding but I have to let it sit more. Can u apply the weld on with water in ? I'm thinking no lolNice, glad to hear u drilled the crack on end. U did a pretty good job if this is ur 1st repair. Some patches arent pretty lol...but its good u used a thick material for the them, #4 first and then #16. I have a 450g cracked end to end on the bottom thats been patched and running around 6 yrs now. Its leaked a cple times over the years but nothin more glue didnt fix. Hope urs holds out for ya!


Nope...gotta drain er back down and dry out before u glue again... so ur patch is holding but now a bottom seam is leaking? 1st try and shoot some #4 into the seam, sand ur areas down for glue, clean with alcohol... then back to patching again inside and out with #16 if thats all u can get ur hands on. Should only need whatever more scrap you can find cheap.
My questions and Wednesday13's answers, post #108 but the discussion started earlier on page 10 bottom. http://www.monsterfishkeepers.com/f...500-gal-13x13x4-5.603969/page-11#post-7601304
Have a couple of questions for Wednesday about a tank I picked up: a 160 gallon acrylic tank that is 8 ft long by 16 in high and 24 in wide with between 1/4 in and 3/8 in size acrylic.
First I a concerned about the thickness of the acrylic, the guy loaded it for me with some buddies but I was able to move it myself with just one of those fish carts, seems pretty light weight. (I am female so not that strong)
I had him fill it 3/4 of the way, it was in an apartment and seemed to hold water fine plus he had pics a week old with it fully filled and stocked with fish.
I was looking for a way to reinforce the tank and came across your thread. I see that someone had already put 1/4 in square rods on all the seams except under the top. There is also some silicone on the front outside corners. I am worried there might have been a previous leak and they repaired it.
The rods do not look like they did a very good job, lots of white areas.
Questions: Do you think the thickness of acrylic is strong enough for dimensions of the tank? Should I use Weldon #4 first on the rods then Weldon #40 or just 40. How do I apply it with the rods already in place, just on each side of the rod or over the entire rod. I know you mentioned heat being an issue with the thickness of acrylic. how thick a bead should I apply?
I also go this tank without a stand, is it ok to test for leaks by filling it on possible uneven lawn and leaving it for a couple of days. Planning on moving in the next couple of weeks so would like to do this project in Florida before I go back to frigid temps in North Dakota.
Thanks,
Diane
Leak_032317
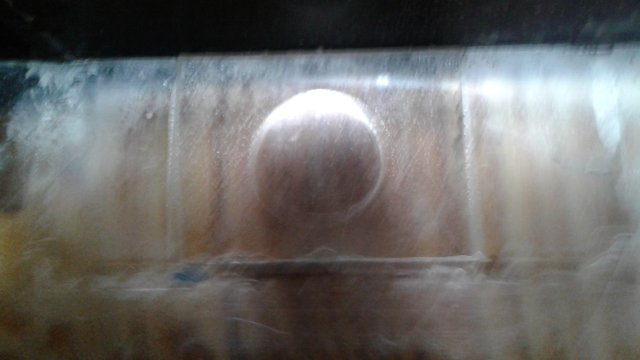
Help (1 of 2), I have a 500 gallon acrylic tank where the previous owner removed the in tank overflows (4) and plugged the bottom drain with a 1/2" piece of acrylic glued to the tank bottom(see pic). I removed the remaining overflow walls with a Dremel and apparently created some channels in the square acrylic plate, the tank leaks quite a bit now, water going under the acrylic plate and out the old bottom holes.

Help (1 of 2), I have a 500 gallon acrylic tank where the previous owner removed the in tank overflows (4) and plugged the bottom drain with a 1/2" piece of acrylic glued to the tank bottom(see pic). I removed the remaining overflow walls with a Dremel and apparently created some channels in the square acrylic plate, the tank leaks quite a bit now, water going under the acrylic plate and out the old bottom holes.

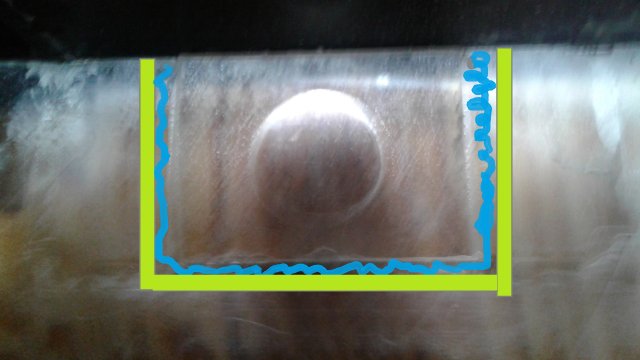
Help (2 of 2). I have read this post with much interest as a "lifeline" to help me resolve these leaks through these bottom acrylic plates. The idea I have come up with is to build a "dam" around the leaking plexi plate swith a 3/8" rectangular acrylic stock. This stock would be glued to the bottom of the tank with Weld on 16. I would also squirt some weld on 4 under the edges of the acrylic plate to soak into some of the voids. Lastly and most importantly I would fill the area between the "dam" and the acrylic plate with Weld On 40 to the height of the plate (approx. 1/2". See the picture, the dam is green, and the Weld on 40 is blue). Better ideas? Key points to make this work? Help me fix this please, my wife thinks my project is becoming a disaster!


Thank you for sharing. I will def use WO40 to reinforce the seams on my tank.


