• We are currently upgrading MFK. thanks! -neo

Silicone and bracing failure

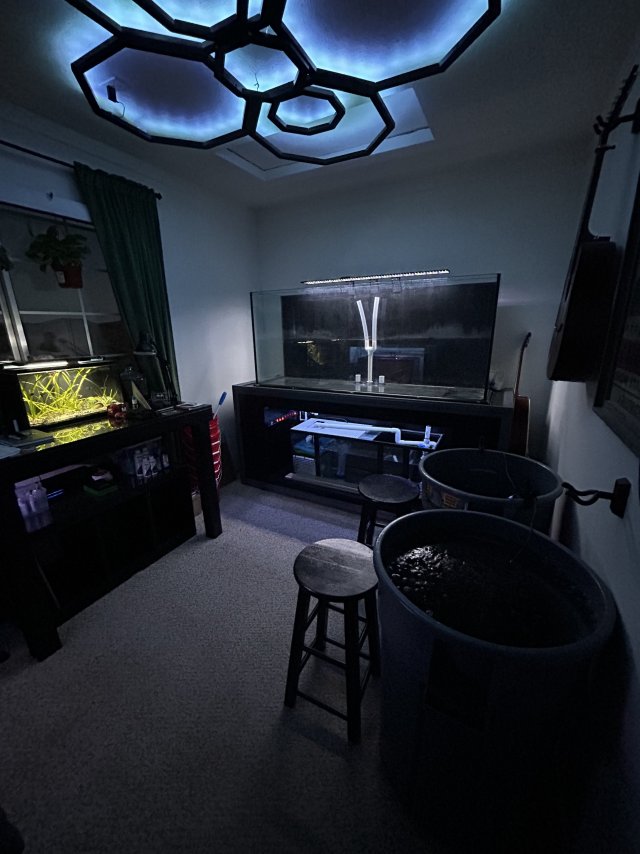
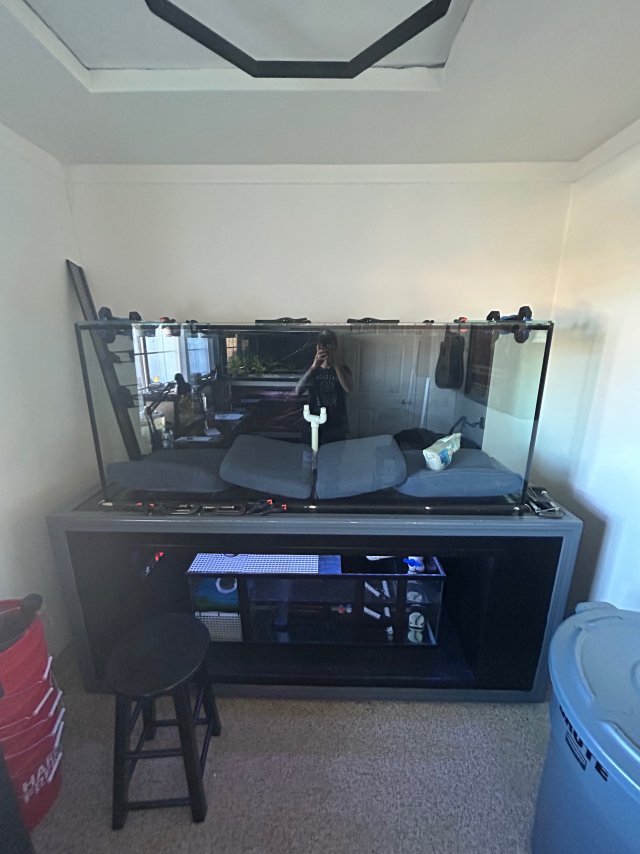
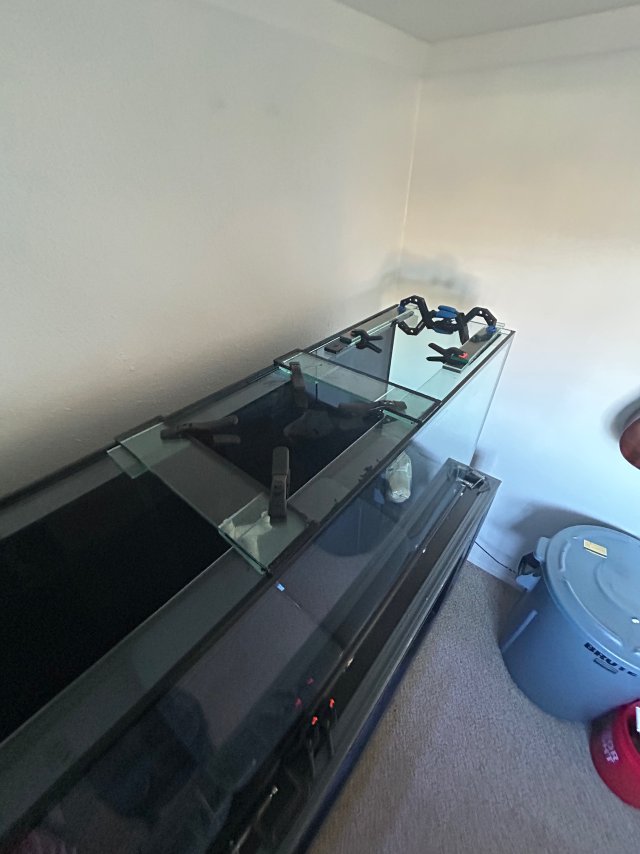
Not to beat a dead horse, but let's say I did a full true euro brace all the way around the inside perimeter of the tank with the option of a couple center cross braces if determined necessary. Obviously, this would mandate a revision of the weir to allow for access by either or both A. shortening it or B. making it stand off the back glass further to get out from under the brace enough for maintenance. Between that and the glass from the euro bracing my guess is I would be a lot closer to that 24" mark that we have been talking about. I haven't worked out the numbers yet but probably somewhere around a 26" water line is my guess. In your opinion would or should this fix my issues allowing me to confidently enjoy this tank or am I just clutching to dreams while wasting time and money?

It's gonna be considerable time, work, and money to do what you're suggesting.

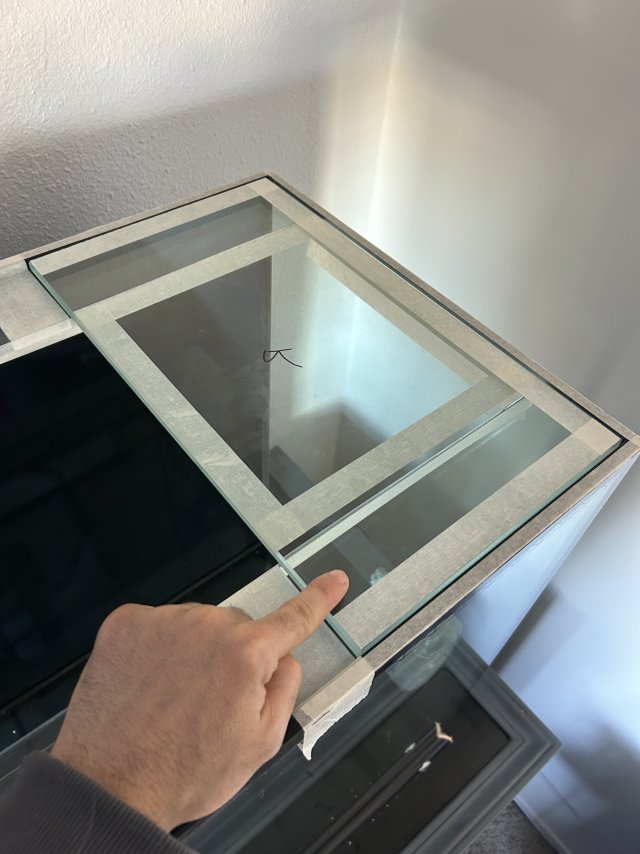
A few years ago I salvaged and scrapped a decades old red sea tank, removed the beautiful PPG Starphire panes, ordered 2x 63"x21"x3/8" tempered low iron panels but the eurobrace pieces I wanted would double the cost of the order--over budget for what was a sort of experimental project tank for me. So I rummaged my garage for scrap lumber and epoxy and came up with a rock solid epoxy coated, lag bolted lumber brace. This is the best pic I can find atm:
1000000949.jpg
It's served me faithfully some three years now, now covered up under the deck for use as I might need it. Will the brace last forever? Idk....I couldn't even tell you what my safety factor is with all the different materials I used. A success nonetheless I say.

My point is: go ahead man. We can't tell you exactly what will work and won't. You seem like you have a knack and desire for DIY tanking and if/when you find some success youll probably want to build bigger and better next time with more hands on experience of what works and what doesnt.

All I can say is you probably shouldn't fill it over 24", but hey, if you want to experiment with a workaround I will not dissuade you any longer.

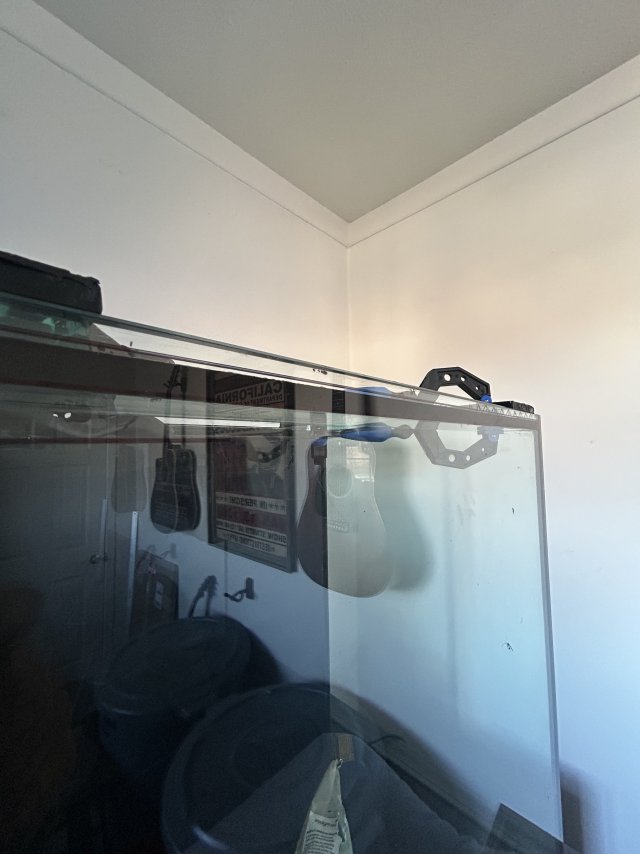
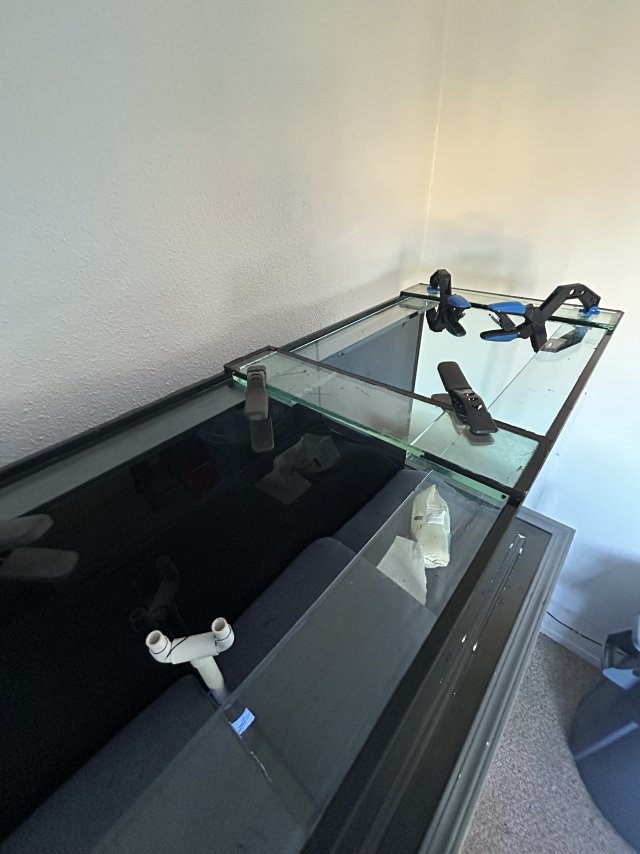
I will say one final time...if that plastic brace is gonna fit on your tank...too easy at $66+a tube of silicone.
 
@Backfromthedead haha I hear you loud and clear. This has already been a learning experience like no other. Nonetheless the knowledge is invaluable.

At this point if I wanted to do a full length euro brace it would only cost me a couple hundred bucks between what I have and what I would need to order everything else I need I could cut.

Or I could just fill this b!tch and cross my fingers 😂😂😂😂

Regardless of what route I choose to go. I will be sure to post my adventure. I truly thank both you and @jjohnwm for taking the time and education. It is sincerely appreciated. If you guys are ever in Commiefornia… Oh, wooops meant to say if you’re ever in California I owe you some beers! 🍻
 
For the record, I want everyone to know I'm currently laid up at home due to a little dirt bike mishap last Sunday. Ended up with a fractured kneecap. Point being, I have AMPLE time to sit around and obsess over this whole thing. Normally I have a life, I swear! 🤣😂

Anyways, I have decided to bite the bullet, pony up the cash and go with a full euro brace.

Two full length 4" x 71" x 1/2" pieces of glass are currently in production. I will be gluing these in front and back recessed at 7/8" and utilizing all the 3/8" glass I already have to bring all bracing up flush nice and clean to the top of the tank. Coincidently, this gives me a convenient lip to rest a lid on down the road if needed that would also remain flush to the top of the tank. Having the top brace recessed also sets the "new top" of the tank (bottom of the euro bracing) to 28 5/8".

I'll get to the weir and water height in a little bit. I'm working on a weir that has the ability to adjust the water line or has some kind of access panel to get in there and service plumbing components is necessary.

The more important question at hand is how much cross bracing should I use? Should I use any at all? I've included a few designs. Again, I swear I do have a life usually.

Was hoping to get a little feedback if you fellas wouldn't mind :cool-1:.

newwwww.jpg
 
Drained the tank, removed the weir, sand, rocks and drift wood. Took the better part of the day! Going to clean the glass up and get everything else prepped for the new glass. Half of which showed up today! 👍🏻

I’ve been able to keep my sump running, and save most of the water I had in the tank with a couple big sponge filters running. Which are know in some brute trash cans along with the water and sand in hopes of not losing any cycle I might have had going. Don’t know if that was worth doing or not. But if nothing else it will save me a couple bucks on water 😑.

Really quite stuck on how to go about layout for the cross bracing. Because of the past scare with the original braces letting go I want to go over board but don’t want to end up with a tank I have almost zero access to because of extra glass on top I ultimately don’t even need.

What to do, what to do…
 

Attachments

  • IMG_5475.jpeg
    IMG_5475.jpeg
    1.1 MB · Views: 13
Last edited:
@Backfromthedead @jjohnwm Did you guys die?!

Progress has been made!

My only question is how to make the top lateral pieces that over lap the lower horizontal pieces look neat. Should I be putting silicone between the two? Take a look at the last picture. How would you go about filling that in? Outline? Zig zag? Completely covered? Leave it bare and just worry about the sides? 🤷🏻‍♂️
 

Attachments

  • IMG_5553.jpeg
    IMG_5553.jpeg
    1.6 MB · Views: 7
  • IMG_5552.jpeg
    IMG_5552.jpeg
    1.2 MB · Views: 6
  • IMG_5551.jpeg
    IMG_5551.jpeg
    1.2 MB · Views: 6
  • IMG_5538.jpeg
    IMG_5538.jpeg
    1.8 MB · Views: 8
  • IMG_5536.jpeg
    IMG_5536.jpeg
    1.7 MB · Views: 10
Apply silicone liberally between the eurobrace panels everywhere they connect and overlap. You just glob it in there, completely covered so there's a whole layer between the glass with no voids. Im not particularly neat with my silicone, always "waste" quite a bit making sure every little nook and crevice is filled in. I use masking tape around the seams, then wait to cure and rip it out. You can always clean off messy spots with razor blades and rubbing alcohol/acetone later.
 
Apply silicone liberally between the eurobrace panels everywhere they connect and overlap. You just glob it in there, completely covered so there's a whole layer between the glass with no voids. Im not particularly neat with my silicone, always "waste" quite a bit making sure every little nook and crevice is filled in. I use masking tape around the seams, then wait to cure and rip it out. You can always clean off messy spots with razor blades and rubbing alcohol/acetone later.
Ha! Thats exactly what I did! 👌🏻

Should have this thing wrapped up and curing by end of the week! I’ll make sure to post some pictures when it’s all done.

This 🤬 thing better hold water! 😂😂
 
Let the countdown to water begin!

There’s so much glass and silicone holding this thing together now it could probably contain a bomb going off inside it at this point.

I went with the 10” lateral bracing. It limits some access but I can still get in there. This tank will forever be a maintenance PITA because of its height so what’s another obstacle?!

Oh yea, I also braced the bottom!

I’m going to give it another week to cure. Over kill, but I want to be on the “safe side”. Pushing it a bit with the water line at 26”.

I decided to use some nice high gloss vinyl wrap to hide the bracing and water line. Added bonus, it keeps my lighting out of sight when looking at the front of the tank. Some might argue the vinyl border defeats the “rimless” look. I disagree. That tape sits so flush it looks like it part of the glass.

REALLY diggin the results! Excited and absolutely undeniably overly terrified to fill it up next week!

IMG_5644.jpegIMG_5642.jpegIMG_5646.jpeg
 
Back
Top