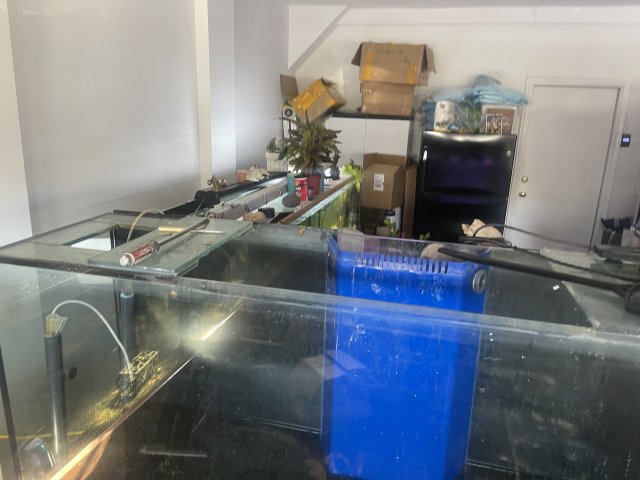
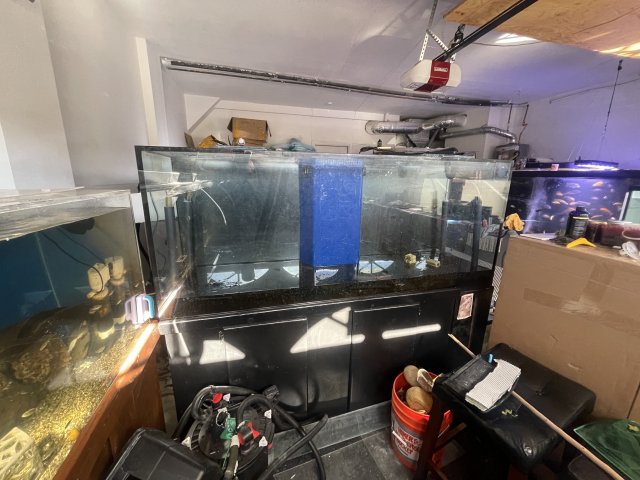
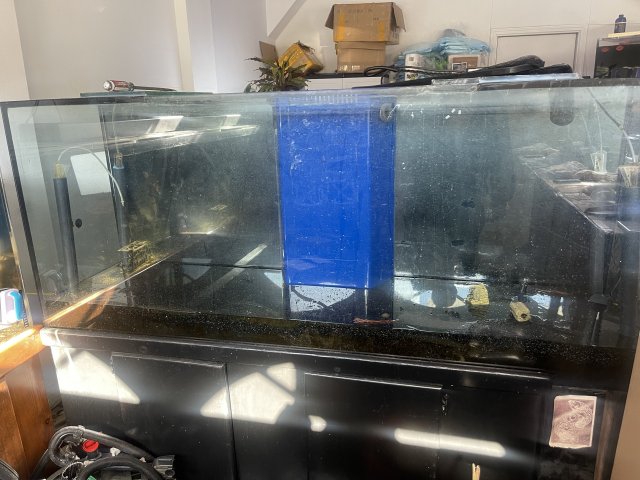
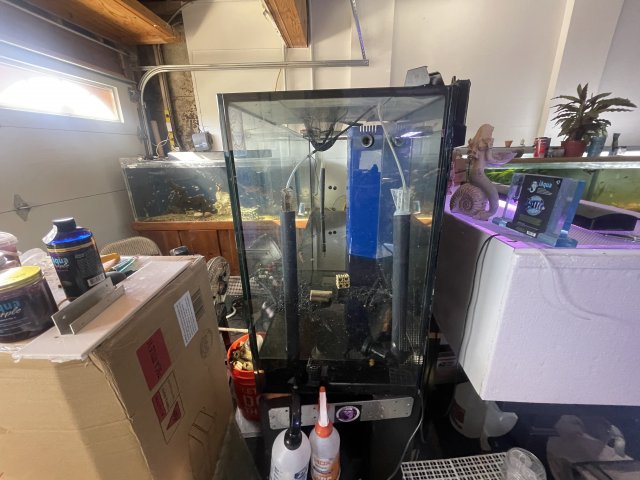
The tank sat around for at least 3 weeks after the silicone was done waiting for its stand to be finished. And probably a couple more weeks before water was added. Silicone had ample time to cure.
Silicone and bracing failure
- Thread starter 805hd
- Start date
You are using an out of date browser. It may not display this or other websites correctly.
You should upgrade or use an alternative browser.
You should upgrade or use an alternative browser.
Yes...its an ill-conceived DIY brace. I have actually committed worse atrocities before learning how the forces involved actually work.
May i ask why are you so averse to keeping only 24" height of water in this tank? It would literally only take removing that overflow (easy), making one even cut across the bottom of it to shorten it(easy) and reinstalling it with silicone (easy). You keep talking about scrapping it...put that plastic frame on and use it for another tank's sump maybe. Or DIY a plywood/hardwood canopy to fit right around the top of the tank and conceal the 6" air gap if youre that concerned about aesthetics. If the seals are still holding water then its not FUBAR yet. Make some mikes hard outta that rotten lemon!
May i ask why are you so averse to keeping only 24" height of water in this tank? It would literally only take removing that overflow (easy), making one even cut across the bottom of it to shorten it(easy) and reinstalling it with silicone (easy). You keep talking about scrapping it...put that plastic frame on and use it for another tank's sump maybe. Or DIY a plywood/hardwood canopy to fit right around the top of the tank and conceal the 6" air gap if youre that concerned about aesthetics. If the seals are still holding water then its not FUBAR yet. Make some mikes hard outta that rotten lemon!
Mmmmmm still not sure on this but I think we may be stating the same thing.No...no..NO!
Not pressure. Force. The hydrostatic force acting on the side wall of a tank is what determines the thickness of glass needed on all panels of the tank. Water pressure simply describes the weight of water, air, everything above at a given point (bottom of tank for our purposes usually). It is absorbed completely by the bottom glass and for this reason there a force that pushes on the side panels.
Hydrostatic force is calculated in a water tank with a integral equation. For some reason the link is no longer working that explains all this better than i can, but In a tank with water, this is simplified to:
F=1/2(0.036xLxH^2)
F being hydrostatic force
L being the length of the tank
H being the height of the water column
Getting tired of reading "height is all that matters" NO. the length of the tank absolutely matters. This is why a tank likeFINWIN is suggesting at 40" long and 33" high may not require the same thickness panels as a tank 80" Long and 33" high.
I'm not doing all the calculations cause 1. I don't know how and 2. I'm an expert half-asser.
We calculated force on the front panel of 72x24 at 746 lbs. earlier in this thread. Every reputable manufacturer in the world makes 6x2x2 tanks out of 1/2" glass. So in my mind 1/2" would work just fine for a tank with a front panel 40x33 and a force of 737 lbs.
The pressure of water (rhoe (which for water is known) xforce of gravity(9.8) x height or depth) (N/m2) is what determines the glass thickness based on acceptable deflection calculations (which is where your tank length comes into it and the modulus of elasticity for glass and it’s tensile strength.
The pressure of water pushing outwards is directly related to the depth of water above that point x the force of gravity. Which is why the calculation of the pressure is still the same one used for a glass tank or a viewing panel under water. But yes the next part of the calculation to work out thickness has to calculate deflection so length that the pressure is acting on matters. It is at this point that instead of using the pressure (N/m2 or N/inch2) you calculate the deflection as though that pressure was a force applied to the centre of the length of the tank glass panel.
So yes it is pressure of the weight of water at depth pushing outwards that you turn into a force applied to the mid point of the front glass panel.
Mmmmmm still not sure on this but I think we may be stating the same thing.
The pressure of water (rhoe (which for water is known) xforce of gravity(9.8) x height or depth) (N/m2) is what determines the glass thickness based on acceptable deflection calculations (which is where your tank length comes into it and the modulus of elasticity for glass and it’s tensile strength.
The pressure of water pushing outwards is directly related to the depth of water above that point x the force of gravity. Which is why the calculation of the pressure is still the same one used for a glass tank or a viewing panel under water. But yes the next part of the calculation to work out thickness has to calculate deflection so length that the pressure is acting on matters. It is at this point that instead of using the pressure (N/m2 or N/inch2) you calculate the deflection as though that pressure was a force applied to the centre of the length of the tank glass panel.
So yes it is pressure of the weight of water at depth pushing outwards that you turn into a force applied to the mid point of the front glass panel.
The pressure is required to find the force and included in that 0.036 simplification above, the force is required to find the deflection(pressure not needed at this point). We may be arguing semantics as so many people everywhere call the force "pressure".

Glass Deflection Calculator - Calculator Academy
Enter the load or pressure, length of the glass panel, modulus of elasticity, and moment of inertia into the calculator to determine the deflection of the…
 calculator.academy
The P In the formula is Point load, denoted in Newtons or lbs-force, which we both know are not pressure units (kpa, psi, atm) but rather units of force. But hey, even that calculator erroneously says "load or pressure", which is very misleading imo. People will try to put the calculated pressure like you're describing into that formula rather than the calculated force which is what is required.
Yes they are related values. My point is that length of the tank absolutely does matter when calculating glass thickness, not just height.
No...no..NO!
Not pressure. Force. The hydrostatic force acting on the side wall of a tank is what determines the thickness of glass needed on all panels of the tank. Water pressure simply describes the weight of water, air, everything above at a given point (bottom of tank for our purposes usually). It is absorbed completely by the bottom glass and for this reason there a force that pushes on the side panels.
Hydrostatic force is calculated in a water tank with a integral equation. For some reason the link is no longer working that explains all this better than i can, but In a tank with water, this is simplified to:
F=1/2(0.036xLxH^2)
F being hydrostatic force
L being the length of the tank
H being the height of the water column
Getting tired of reading "height is all that matters" NO. the length of the tank absolutely matters. This is why a tank likeFINWIN is suggesting at 40" long and 33" high may not require the same thickness panels as a tank 80" Long and 33" high.
I'm not doing all the calculations cause 1. I don't know how and 2. I'm an expert half-asser.
We calculated force on the front panel of 72x24 at 746 lbs. earlier in this thread. Every reputable manufacturer in the world makes 6x2x2 tanks out of 1/2" glass. So in my mind 1/2" would work just fine for a tank with a front panel 40x33 and a force of 737 lbs.
The bottom is a different story since the height is different. But I don't know all those deflection calculations so if I'm building that tank it's getting a 3/4" bottom and that's that.
FINWIN i must confess when I delivered that stand to your home I had an ulterior motive...I wanted to inspect that big tank
. I think you hit it on the head. That beefy aluminum frame both reinforces the entire bottom silicone seam and augments the front panel by encasing the top and bottom of the glass in 2-3" of thick aluminum. In my mind this effectively shortens the water column that is only supported by the glass and adds the strength of that aluminum to the entire height which is a ridiculous bunch more math so lets just say customaquariums has it figured out better than we do, obviously a very strong design when inspecting the tank...I still wanted to get my long straightedge out of the truck and check for deflection though

Ha haa...sneaky
Yeah that frame is no joke. I almost had to break one of the AquaClear 100s to remove and check the impeller! Even now I dread having to move/remove those. I don't know what it's sealed with (maybe concrete, lol) but that frame doesn't flex and doesn't move! The bottom is the same.
Because I was getting an oscar I went with tempered on the front and sides. Wasn't necessary for the printed back and bottom (and I paid attention to posts here about the difference in case of a blowout). I also wanted more gallons on the same footprint. So the original order would have been 3/4" glass all around but when I changed to tempered, it went to 1/2". So a 215 became a 225. The bottom is still 3/4" that wasn't going to change in the specs. When I requested tempered Custom Aquariums said it would be 1/2" no problem.
Turned out to not be a bad decision. My oscar Brick had no problem moving objects up to 5lbs once he got to a foot. I had a large ceramic log cave he slammed/knocked against the walls more than once. Ditto on some 8 inch boulders he would bang against the front and build a fortress wall. So not tempting fate I took that stuff out. Fish was strong asf and I still miss that big goofball.
Coming downstairs to boulders piled against the front glass wasn't something I wanted to see!
Hiding the 6” gap and plastic rim behind a canopy isn’t the worst idea I’ve heard.
You really don’t think the bracing design I can up with would be able to withstand the forces with all that tensile and shear it encompasses? Even if I keep the water at 24”?
I’m not holding you to anything, you have already stated your case with exact numbers to back it. lol forgive me, I’m just holding on to the dream with white knuckles!
There are a lot of words like force and pressure and many others that do have very rigid definitions as used by scientists and engineers...but which are misused in general conversation so often that they often create more confusion rather than less. I think that at least partially explains what's going on here. If I have a one-inch iron rod that is 6 inches long, there is no way that I am able to flex it at all...but if the rod is ten feet long and support only at the ends...analogous to the top edge of the front glass on a big tank...then I can easily flex it by pushing with just my thumb right in the unsupported middle. Figuring out the terminology to explain why this occurs might be interesting...or it might not!...but it changes nothing; I don't need to know how many pounds or FigNewtons of force or pressure or whatever I am applying. I also don't need to know the exact temperature at which a specific substance burns to know that I won't be sticking my fingers into the flame. 
8 805hd , no matter how much you scrape and rub the glass before applying silicone, it's always a good idea to also clean it with acetone or alcohol or some other solvent that will remove oils and other contaminants that will mess with your seal. I keep looking at that pic of the end of the brace ripped loose; it almost appears that all the silicone adhered well to the top edge of the front glass, but simply did not have a strong bond to the glass of the brace? Or am I seeing that wrong? Aside from a thin tiny strip of silicone that tore loose and stayed on the brace, is all the rest of it still sitting on the glass top edge as it appears? That would imply to me that there was some film of contamination on the surface of the brace itself. It does not take much to screw up the silicone/glass bond. We can do all the mathematical gyrations and semantic backflips we want...but most of the time it is simply imperfect construction techniques that bite us on the ass.
IMHO, reducing the water depth of this tank to 24 inches would allow you to likely get away without any braces at all, assuming that all the joints and seams are well-done. But...can we assume this? Other joints might also be less than perfect, and simply are lasting longer before they give up the ghost.
Now, I certainly get the appeal of the rimless look, especially in a tank fitted with an overflow that keeps the water level constant...but you can't always get what you want. So, if you don't want to enclose the top of the tank in a hood, another easy approach would be to simply attach a full length Eurobrace across the front and back of the tank, with the rear one attached externally. A 4 or 5 inch width of half-inch glass would be plenty. This would mean that you'd need that much space between the tank and the wall behind it, which is never a bad idea. This would not interfere with your existing weir at all. You could rebuild it to a lower height as suggested above, or you could simply put a new series of vertical slots at the lower water level with some careful plunge cuts and leave the rest intact, maybe without even removing it from the tank at all if you are careful.
The front Euro brace would need the edges of the glass polished to look nice. Stick it on top of the front panel, adhering it to that and also to a couple inches at the front of each end piece. It can project out to the front a couple inches, or can be entirely above the tank; either way, you will have vastly more access to the tank interior than your current setup allows. That front glass brace will be a nice little shelf, perhaps for a couple trailing potted plants that can be allowed to hang down at the ends, or maybe some small knick-knacks or...whatever. Even with nothing on it at all, it will IMHO have a much nicer, cleaner look than that pile of assorted glass strips you started out with. Be honest; when you think of that beautiful rimless look...is that tank with all those braces on it the image in your mind?
Whatever you do, the critical thing is clean, clean, clean that glass before building the thing...it's much more important than doing any math to figure out just how much you can get away with in terms of water depth. Could you get away with the entire 30-inch depth with this plan? Beats me; I wouldn't do it, but I'm not a gambler. 24 inches of water depth is my personal limit.
I'm watching this thread like a hawk; can hardly wait to see how it turns out. Good luck!

I...can't say anything for certain, man. Yeah it'd probably be fine. I personally think the black plastic brace would look nicer with just an air gap at the top. Would support the tank better as it is a one piece brace that braces from all sides at once at every point on the rim, and would provide better access to the tank. All I can say.
Your tank would be partially eurobraced, not rimless. THIS is a rimless tank:
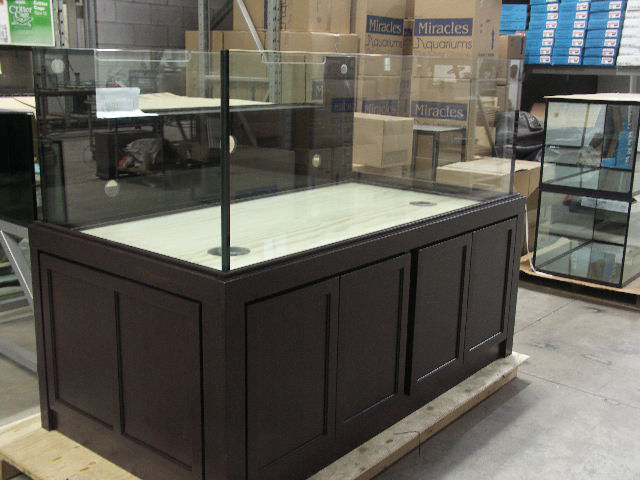
 www.miraclesaquariums.com
Your tank would be partially eurobraced, not rimless. THIS is a rimless tank:

Miracles Aquariums Custom 72" x 38" Rimless Tank & Stand. | Custom Aquarium Builder
Miracles Aquariums Custom 72" x 38" Rimless Tank & Stand. Beautiful custom reef aquarium setup.


