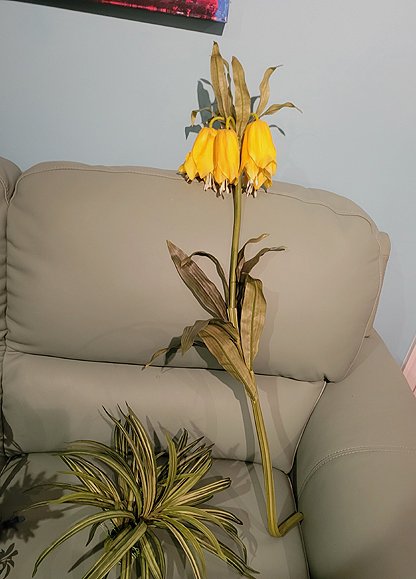
Decisions made.
- Thread starter FINWIN
- Start date
You are using an out of date browser. It may not display this or other websites correctly.
You should upgrade or use an alternative browser.
You should upgrade or use an alternative browser.
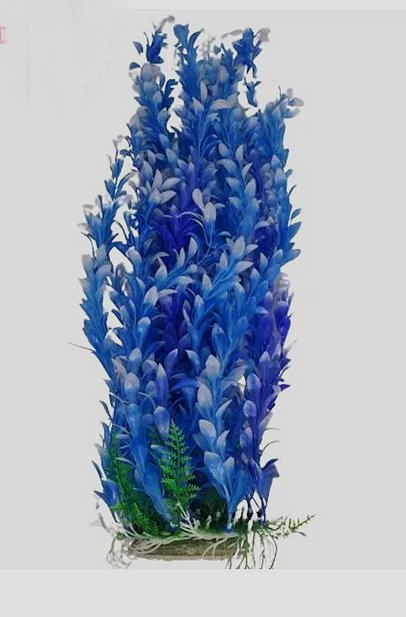
The blue plant was a project. I wanted something in this color but notice ALL artificial blue plants look ridiculous, always a flat color and white at the top (what's the deal with the white tips?) So I figured to make it work. Krylon paint to the rescue!!!
Here, I started by painting the white tops green then spot overspray on the existing color.. Then more blue in a light coat over those same areas. I finished with brown at the base, spot spraying lightly up the branches. You want some of the original color showing! That's the key.
Compare the before and after. Typical blue plastic plant before, looks flat and neon. Looks like 'real' wet blue elodea in the after pic. BOOYA! With light overspray the plant dried quickly. This only took me about 3 hours mostly for dry time. I would periodically overspray until I got the look I wanted. Outside is best for this. I use plastic trash bags to prevent sticking.
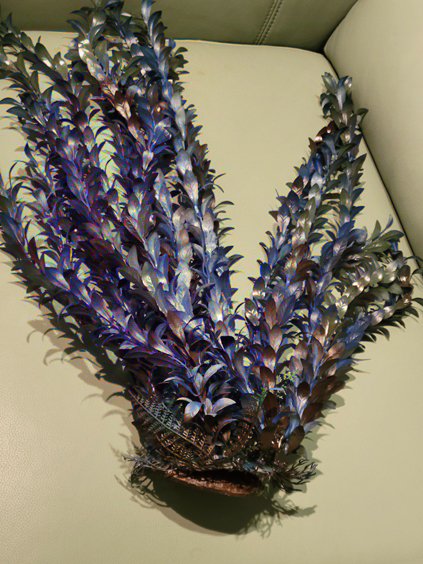


These colors will transform any plastic plant even yellow and white ones.
Moss Green
Deep Green
Brown
Light Gray
Burgundy
Blue (either the cobalt or navy color)
Black (use sparingly or you will need to overspray with a color to blend)
Green and Brown are the best colors to paint the base with so the plant looks like its growing out of something. Black makes the base disappear.
I might do an orange, red and hot pink plant as a demonstration at another time. All you're really doing is toning down flat color and giving it depth. What we call 'real' looking is just shadings. That's why even a lot of the green plants look weird, just one bright flat tone. A lot of stuff looks fake in nature based on our idea of 'real.'
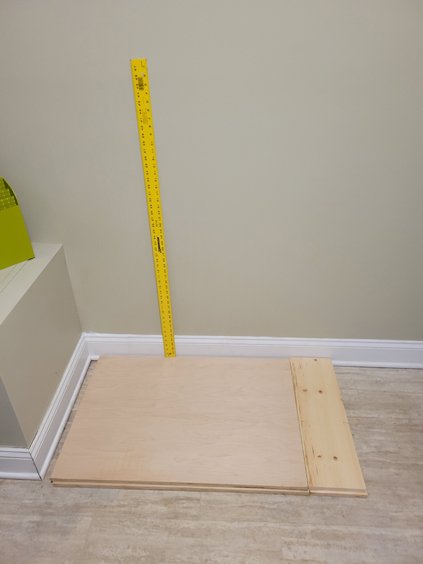
Moving on to the table top support. So I went to Home depot and rooted around some scrap lumber. One of the workers was kind enough to cut me a piece during his lunch break. I needed another 7" x 24" plank so I could double up everything. Once he cut the plank I ended up with three pieces, two 7" x 24" and one slightly oversized piece. Worked out perfectly.
Here's everything all doubled up. Really helps to see the 3D space the tank will occupy. Total plank area 24" x 41".
For a half inch lip all around the Tank floor will be 23" x 40". I always allow for material width with acrylic tanks. It's never good to 'run it right up to the edge.' I've seen some weird stuff with acrylic tanks online "hanging out" over stands but it's their blowout, not mine.
Metal ruler is 48". Gives me a rough idea of the total height as well.
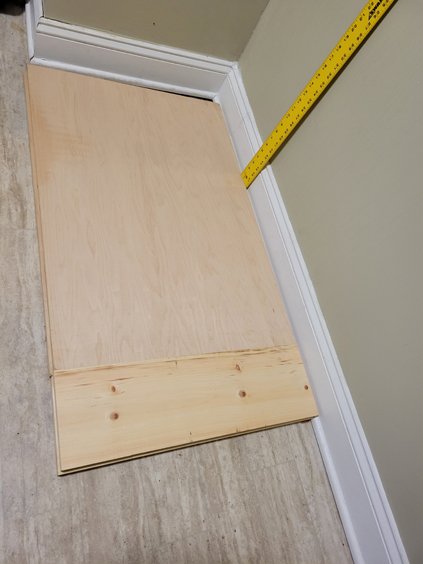


Adjusted tank size to order: 40L x 23w x 33 H = 133 gallons.
how boxy? Check this ratio. Cubular!!
1: .9 : .7
how boxy? Check this ratio. Cubular!!
1: .9 : .7
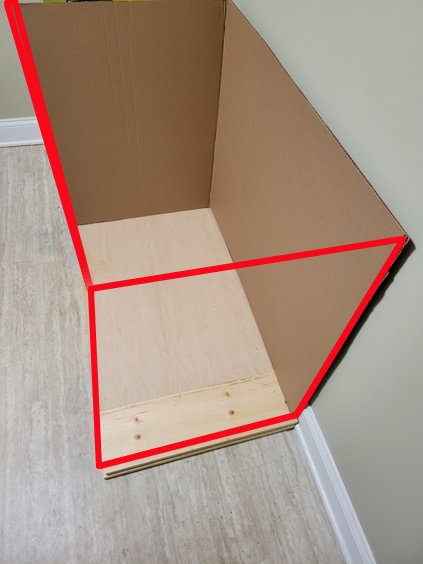
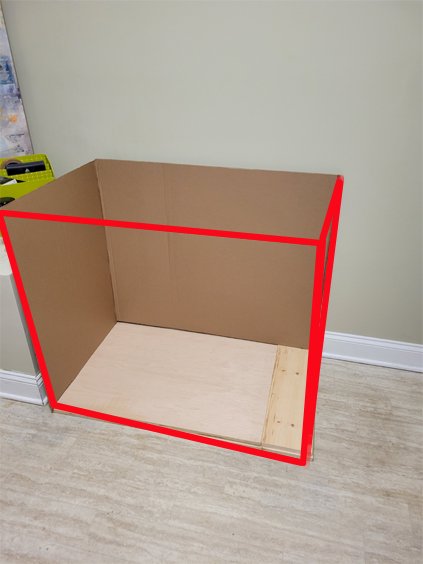
This is a simulation of the actual tank space. The cardboard is the backing for the brick background. I've secured it in the back on a hinge of tape. Side panel is actually 24 1/2" width to account for the thickness of the cardboard. I'll overlap it a bit at the seam. Can't emphasize enough to account for all three dimensions when measuring! Now I can really see the space the tank will occupy.
Been debating using 2 versus 3 rows of blocks. Height wise here's what they would be:
2 rows 16" plus 1 1/2 tabletop. So 33" plus 17 1/2" would be 50 1/2" total height.
3 rows 24" plus 1 1/2 tabletop. So 33" plus 25 1/2" would be 58 1/2" total height.
what y'all think? I'm wondering if three might be overkill. Maybe two rows and the caps instead?


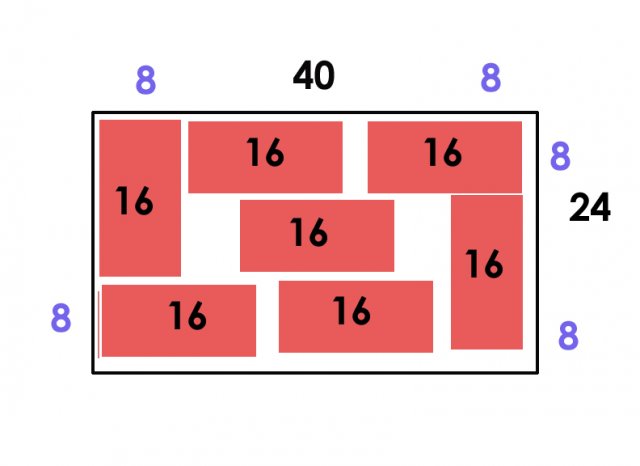
Decided to go with this block layout for maximum support of acrylic base. Will be doing 2 rows of blocks topped with the caps. It seems as though there are two heights to the caps. One version is 4 inches, one is 2 inches.
4 inch caps would be total height 8 + 8+ 4+ 1 1/2+ 33 = 54 1/2 inches
2 inch caps would be total height 8 + 8+ 2+ 1 1/2+ 33 = 52 1/2" inches
I feel this height is a good compromise considering the room size and viewing angle.
To hide the blocks I'll probably use velcro on curtain valances and wrap around.
Finalized block layout. The "L" configuration is better than horizontal central stack. This gives complete support. Space underneath isn't an issue since I have a storage tote under the growout on the opposite wall.

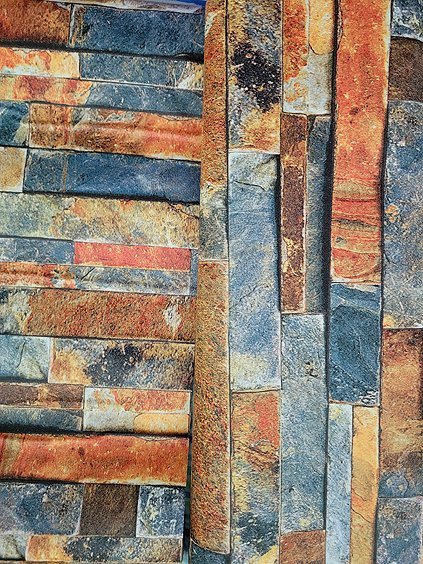
The contact paper for the background arrived today. I laid it out perpendicular. It's not as red as the original picture, more orangey, green, teal and kind of amber. I'll look over the sand colors again, most likely will be doing a mix. Here's the pattern. It's a "3D" print.
And the sand. All of these colors are on the table and its looking like it will be a mix. To be determined.
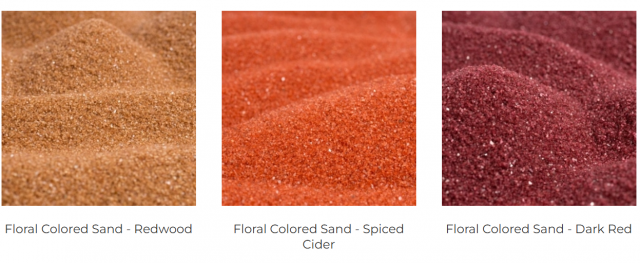
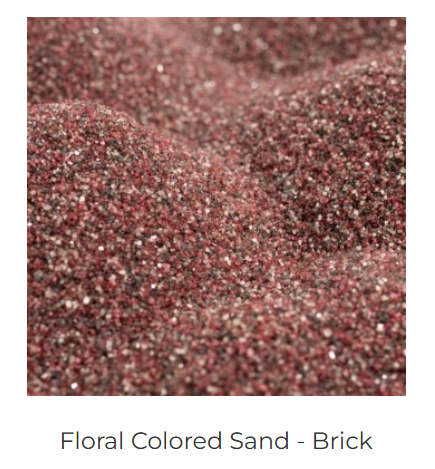
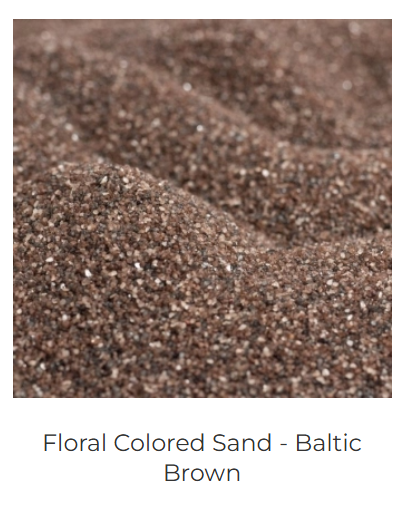

And the sand. All of these colors are on the table and its looking like it will be a mix. To be determined.


Random thoughts:
I love that background...except I find the juxtaposition of vertical and horizontal "seams" very jarring. Personally, I'd much prefer all one or all the other; for your vertical tank I think the vertical seams would be preferable, IMHO. Depending upon the size of the sheets, maybe you could cut the background at an angle so that the slabs of rock appear to be leaning one way? Play around with it.
Putting about as much thought into your substrate colour choice as I have put...in total...into all my substrates for the past half century ...I think you need a mix of Redwood, Spiced Cedar and a bit of Baltic Brown. I gotta admit that I feel a little bit silly even typing that...
Once upon a time, I experimented with an all-glass tank, which also had an exterior photo background. I laid it on its back, poured a few small puddles of clear epoxy on the back panel here and there, and sprinkled those spots with some of the same sand that was used for the substrate. I found that it really helped to blend the background and substrate and also provided a wee bit of a 3D look to the tank overall. With the background you have chosen, it would also soften all those hard visible joints and edges.
IMHO, you are getting unbelievably carried away with the concrete supports. That setup as shown not only removes any chance of undertank storage (and I get that you are not concerned with that...) but it's gotten to the point where you won't even be able to get your hand under there to retrieve a jumped fish, or roust out a wayward spider. It's bordering on a solid concrete pylon! Ease up a bit!
I can't help but mention that a strong enough top would allow you to simply have a column in each corner while supporting the entire floor of the tank. Those columns could consist of vertically stacked blocks, rather than horizontal. You'd use one or two blocks per corner, not a truckload like that drawing calls for.
Yes, yes, I know...someone will immediately pipe up and say "No! Don't do that! The blocks must be oriented with the openings facing up/down, with no gaps visible or accessible!" While it's true that the maximum strength is obtained that way, the simple fact is that these blocks are astronomically stronger than required for this application, even when placed the "wrong" way. Enough is enough; too much is just silly and wasteful. Placing the blocks "incorrectly" will leave a beautiful big space under there allowing for the immediate or future installation of a sump (preferable) or even one of those horrid canisters over which so many people swoon.
Excellent to hear that you have considered the usable space in the tank; you can definitely find fish species that will use some of that possibly-barren upper part of the tank, although maybe not with the fish you have already chosen. But all is not lost; if you snoop and search around enough you should be able to find some sort of long driftwood decor that can be mounted vertically, and that will provide some much-needed "vertical substrate" for many fish. A piece like that can, if waterlogged, simply be placed on the bottom so that it projects upwards. Another great way to use one is to use some sort of clip or zip-tie construction to attach it to the tank's top rim or crossbrace; once you find just the right placement, you can saw off the part that sticks above the water surface so that it doesn't interfere with the tank cover. You'd be well-advised to have the background sorted out and installed before playing with the orientation of the wood to make sure the two don't create a jarring effect together. Lots of "bottom-oriented" fish are, in reality, "structure-oriented" and a vertical piece hanging over their heads makes them comfortable using the entire tank depth.
Painted pineapples? Hydrangeas? Mums...crocuses...hot pink...?!?!?!? Hey...it's your tank... Just a few suggestions and ideas, purchase price cheerfully refunded if you don't use any of 'em.
I love that background...except I find the juxtaposition of vertical and horizontal "seams" very jarring. Personally, I'd much prefer all one or all the other; for your vertical tank I think the vertical seams would be preferable, IMHO. Depending upon the size of the sheets, maybe you could cut the background at an angle so that the slabs of rock appear to be leaning one way? Play around with it.
Putting about as much thought into your substrate colour choice as I have put...in total...into all my substrates for the past half century
Once upon a time, I experimented with an all-glass tank, which also had an exterior photo background. I laid it on its back, poured a few small puddles of clear epoxy on the back panel here and there, and sprinkled those spots with some of the same sand that was used for the substrate. I found that it really helped to blend the background and substrate and also provided a wee bit of a 3D look to the tank overall. With the background you have chosen, it would also soften all those hard visible joints and edges.
IMHO, you are getting unbelievably carried away with the concrete supports. That setup as shown not only removes any chance of undertank storage (and I get that you are not concerned with that...) but it's gotten to the point where you won't even be able to get your hand under there to retrieve a jumped fish, or roust out a wayward spider. It's bordering on a solid concrete pylon! Ease up a bit!
I can't help but mention that a strong enough top would allow you to simply have a column in each corner while supporting the entire floor of the tank. Those columns could consist of vertically stacked blocks, rather than horizontal. You'd use one or two blocks per corner, not a truckload like that drawing calls for.
Yes, yes, I know...someone will immediately pipe up and say "No! Don't do that! The blocks must be oriented with the openings facing up/down, with no gaps visible or accessible!" While it's true that the maximum strength is obtained that way, the simple fact is that these blocks are astronomically stronger than required for this application, even when placed the "wrong" way. Enough is enough; too much is just silly and wasteful. Placing the blocks "incorrectly" will leave a beautiful big space under there allowing for the immediate or future installation of a sump (preferable) or even one of those horrid canisters over which so many people swoon.

Excellent to hear that you have considered the usable space in the tank; you can definitely find fish species that will use some of that possibly-barren upper part of the tank, although maybe not with the fish you have already chosen. But all is not lost; if you snoop and search around enough you should be able to find some sort of long driftwood decor that can be mounted vertically, and that will provide some much-needed "vertical substrate" for many fish. A piece like that can, if waterlogged, simply be placed on the bottom so that it projects upwards. Another great way to use one is to use some sort of clip or zip-tie construction to attach it to the tank's top rim or crossbrace; once you find just the right placement, you can saw off the part that sticks above the water surface so that it doesn't interfere with the tank cover. You'd be well-advised to have the background sorted out and installed before playing with the orientation of the wood to make sure the two don't create a jarring effect together. Lots of "bottom-oriented" fish are, in reality, "structure-oriented" and a vertical piece hanging over their heads makes them comfortable using the entire tank depth.
Painted pineapples? Hydrangeas? Mums...crocuses...hot pink...?!?!?!? Hey...it's your tank...
Last edited:
Random thoughts:
I love that background...except I find the juxtaposition of vertical and horizontal "seams" very jarring. Personally, I'd much prefer all one or all the other; for your vertical tank I think the vertical seams would be preferable, IMHO. Depending upon the size of the sheets, maybe you could cut the background at an angle so that the slabs of rock appear to be leaning one way? Play around with it.
Putting about as much thought into your substrate colour choice as I have put...in total...into all my substrates for the past half century...I think you need a mix of Redwood, Spiced Cedar and a bit of Baltic Brown. I gotta admit that I feel a little bit silly even typing that...
Once upon a time, I experimented with an all-glass tank, which also had an exterior photo background. I laid it on its back, poured a few small puddles of clear epoxy on the back panel here and there, and sprinkled those spots with some of the same sand that was used for the substrate. I found that it really helped to blend the background and substrate and also provided a wee bit of a 3D look to the tank overall. With the background you have chosen, it would also soften all those hard visible joints and edges.
IMHO, you are getting unbelievably carried away with the concrete supports. That setup as shown not only removes any chance of undertank storage (and I get that you are not concerned with that...) but it's gotten to the point where you won't even be able to get your hand under there to retrieve a jumped fish, or roust out a wayward spider. It's bordering on a solid concrete pylon! Ease up a bit!
I can't help but mention that a strong enough top would allow you to simply have a column in each corner while supporting the entire floor of the tank. Those columns could consist of vertically stacked blocks, rather than horizontal. You'd use one or two blocks per corner, not a truckload like that drawing calls for.
Yes, yes, I know...someone will immediately pipe up and say "No! Don't do that! The blocks must be oriented with the openings facing up/down, with no gaps visible or accessible!" While it's true that the maximum strength is obtained that way, the simple fact is that these blocks are astronomically stronger than required for this application, even when placed the "wrong" way. Enough is enough; too much is just silly and wasteful. Placing the blocks "incorrectly" will leave a beautiful big space under there allowing for the immediate or future installation of a sump (preferable) or even one of those horrid canisters over which so many people swoon.
Excellent to hear that you have considered the usable space in the tank; you can definitely find fish species that will use some of that possibly-barren upper part of the tank, although maybe not with the fish you have already chosen. But all is not lost; if you snoop and search around enough you should be able to find some sort of long driftwood decor that can be mounted vertically, and that will provide some much-needed "vertical substrate" for many fish. A piece like that can, if waterlogged, simply be placed on the bottom so that it projects upwards. Another great way to use one is to use some sort of clip or zip-tie construction to attach it to the tank's top rim or crossbrace; once you find just the right placement, you can saw off the part that sticks above the water surface so that it doesn't interfere with the tank cover. You'd be well-advised to have the background sorted out and installed before playing with the orientation of the wood to make sure the two don't create a jarring effect together. Lots of "bottom-oriented" fish are, in reality, "structure-oriented" and a vertical piece hanging over their heads makes them comfortable using the entire tank depth.
Painted pineapples? Hydrangeas? Mums...crocuses...hot pink...?!?!?!? Hey...it's your tank...Just a few suggestions and ideas, purchase price cheerfully refunded if you don't use any of 'em.

Yeah after toggling the background I'm going for the vertical application. I want to emphasize the height and boxiness. In this case vertical bricks will actually make the tank appear even larger because it's so square.
Again, acrylic tanks need full support at the bottom, ALL edges. That includes weight distribution, not just the table top support. You don't want gaps and open areas underneath. All acrylic tanks have some degree of bow on the sides (fill one to the brim, wait a minute and you'll see the water 'goes down' up top. That tells you the amount of bow). You don't want that AND a potential bow underneath. You're asking for a slow blowout over time. Essentially the sides would pull away from the upper bracing weakening the welds. Also the PSI pressure on a tall tank is higher at the bottom than a long one.That's why dry weight goes up geometrically on tall tanks because they need thicker walls. There's calculators for this but you get the idea. Weight on a smaller footprint + height. I've been on boards where people only supported the edges on acrylic tanks. Some got blowouts in 3 months others at about a year. No thanks. Plus blocks are cheap. Home renovation and repair not so much.
Good combo idea on the sand color. I'm def using the Redwood after seeing some samples. It's just a matter of the other mix ideas. Calculator says about 93 lbs for two inches but the floral sand is so coarse with gaps (its for plant roots) 75-80lbs likely would work. I got only 80 lbs in the 225 at one inch. Redwood will be the base color. The Brick color is too flat so that's a sratch.
Likely Redwood/Dark Red/Spice/Baltic Brown. Since I've ordered before I get discounts. Santastik gives lightning fast delivery.
So say 90 lbs I'm looking at
15 lbs Baltic Brown 17%
20 lbs Spiced Cider 22%
20 lbs Dark Red 22%
35 lbs Redwood 39%
I may get some pre drilled slate taxidermy pieces to put the tall stems in. Looking at driftwood as well. I'm not using all the plants, just a combo that will work with the background and substrate.
I'm creative but cheap when necessary. Artificial plants (over 22-24") for tall tanks are ridiculously expensive ($29-$60 bucks each). No way. So when I can get big plants for $4 to $12 bucks apiece, I'm gonna go for it. Will post up once the contact paper is attached.


